Update localization service with new format data
This article describes in detail the complete operation process of re-adding Blocks to the cloud localization library after switching the localization library data format.
Operation steps
Enter cloud localization library management page
Log in to EasyAR Developer Center, select
Mega Block->Block Cloud Localizationfrom the left menu bar, select the corresponding Mega cloud localization service group, and clickManage.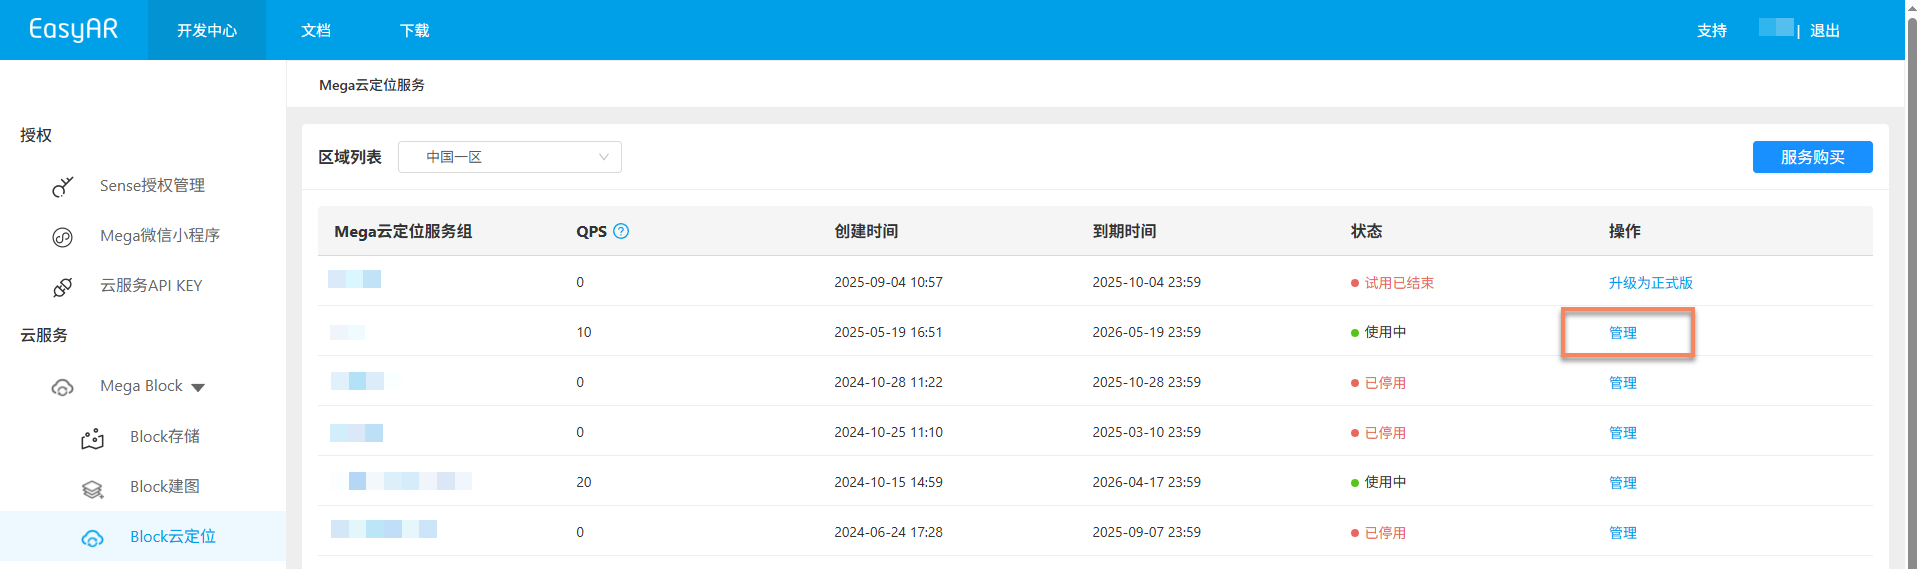
Select the corresponding cloud localization library and click the
Managebutton to enter the cloud localization library management page.
Add Block
Click the
Addbutton.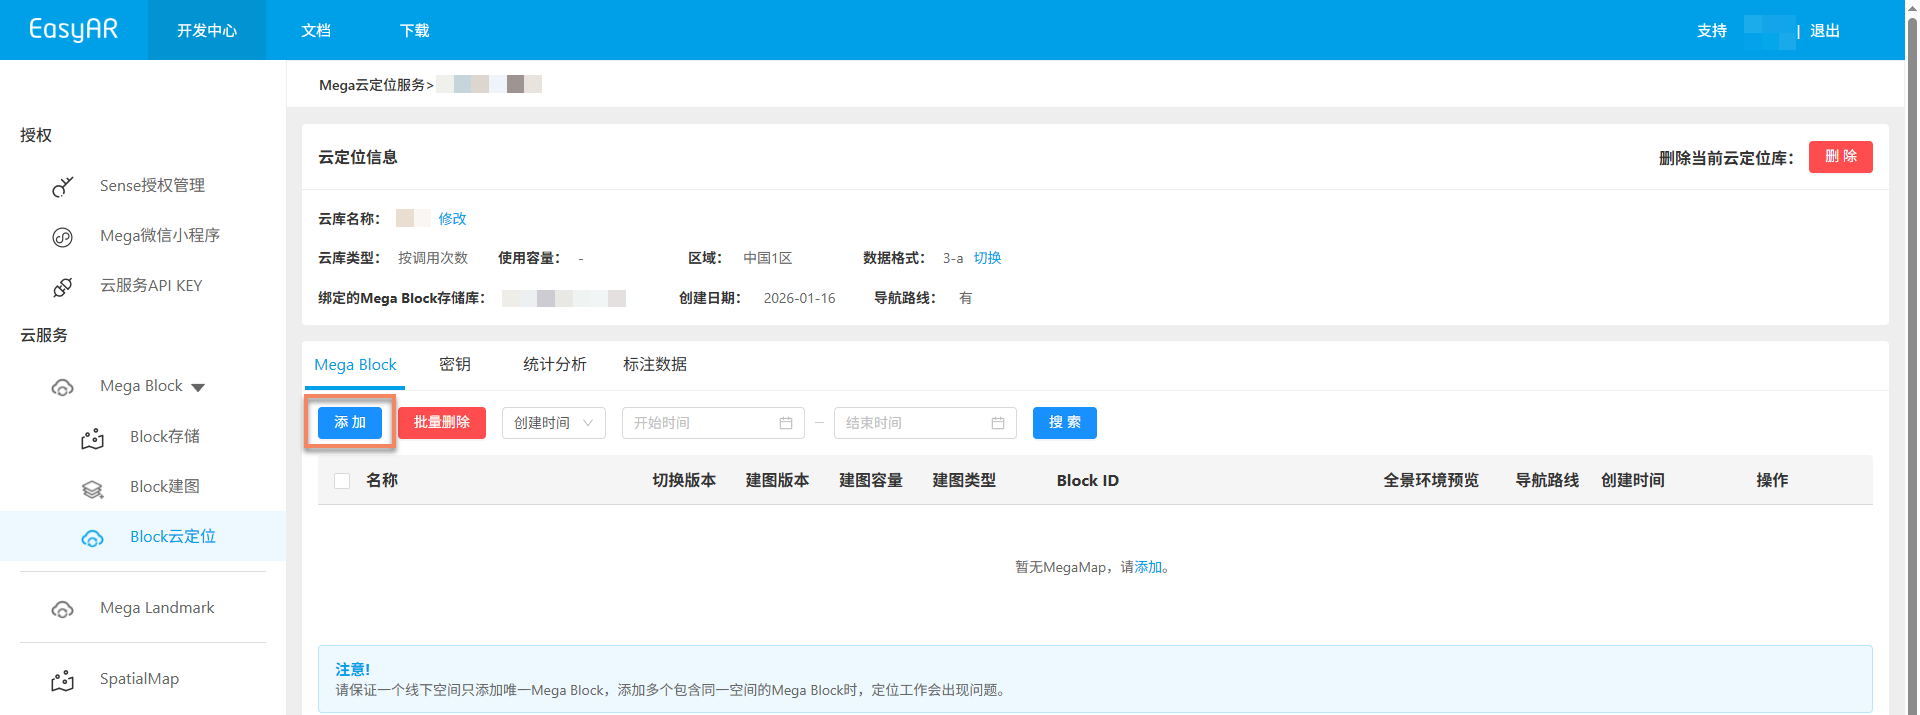
Select the Block to add in the popup, and then click the
Confirmbutton at the bottom of the popup.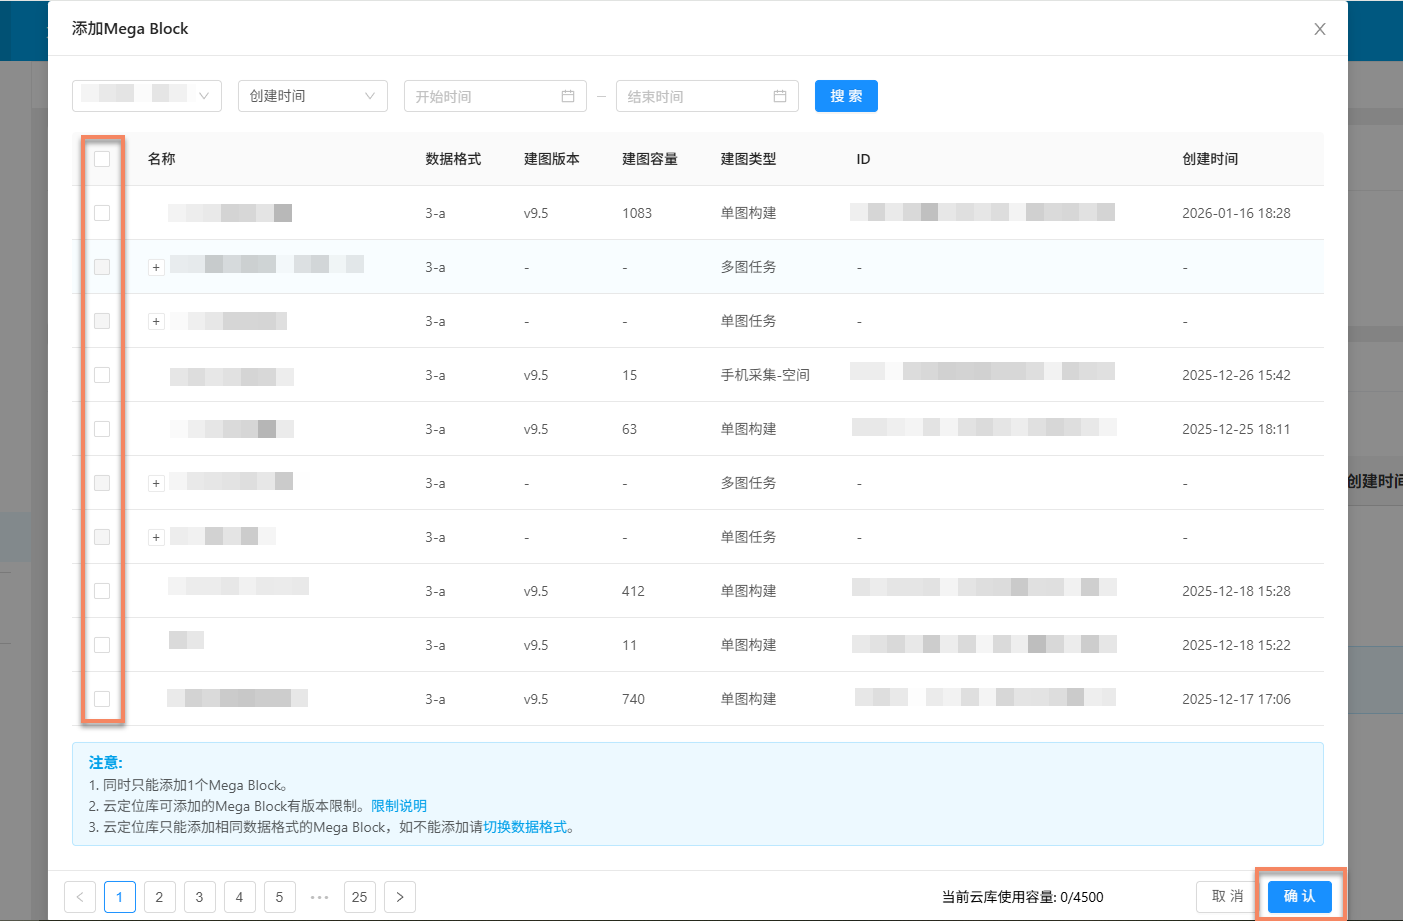
Note
- Only one Block can be added at a time.
- A cloud localization library can only add Blocks with the same data format.
- Cloud localization libraries of different versions have restrictions on the Block mapping version. For details, see the notes at the bottom of the popup.
View adding progress
After confirming the addition, you can view the adding progress on the page.
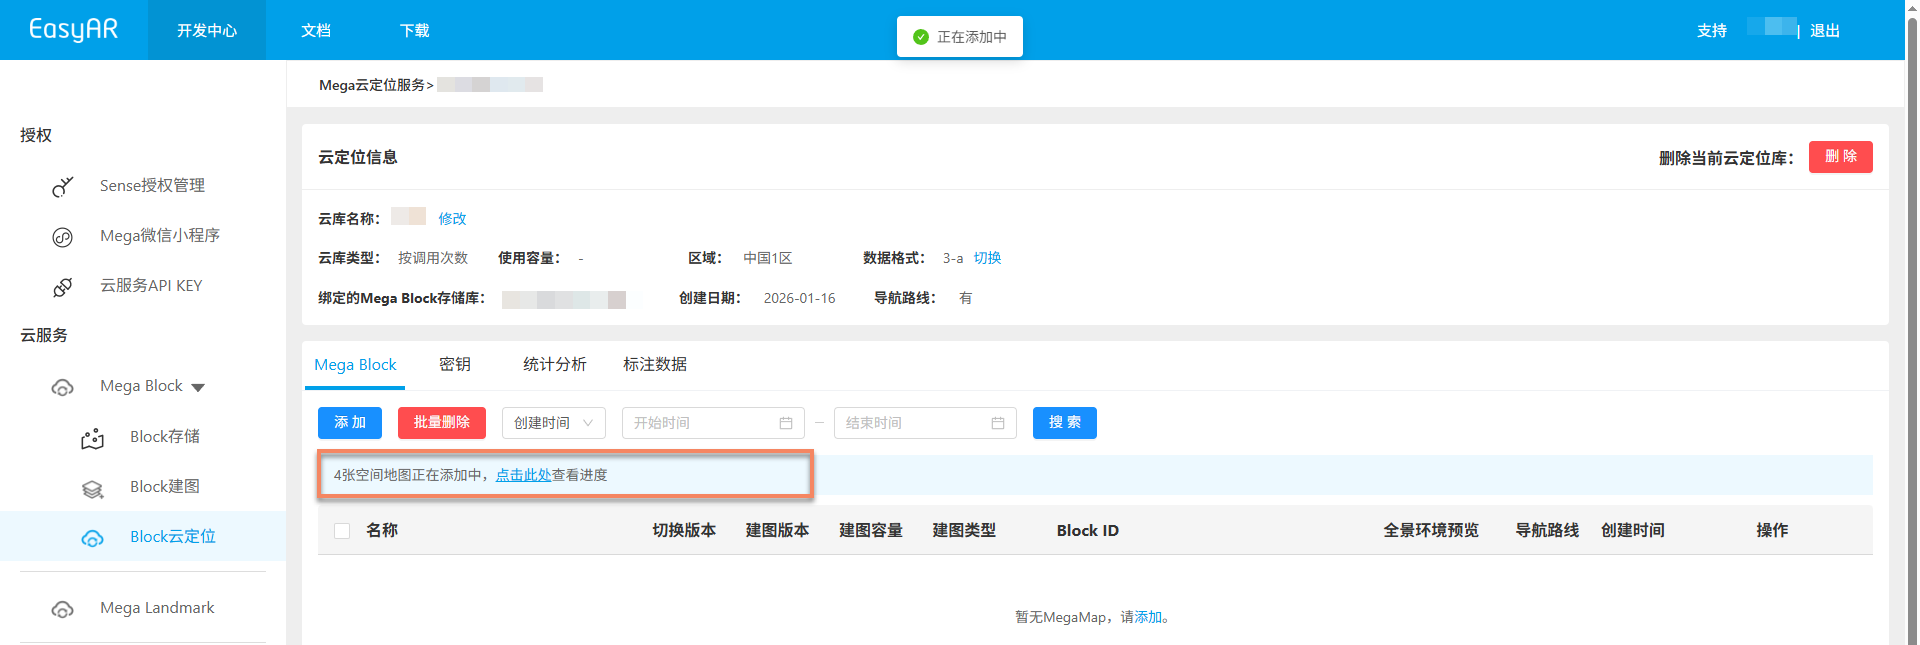
After the addition succeeds, the corresponding Block appears in the Mega Block list of the cloud localization library.
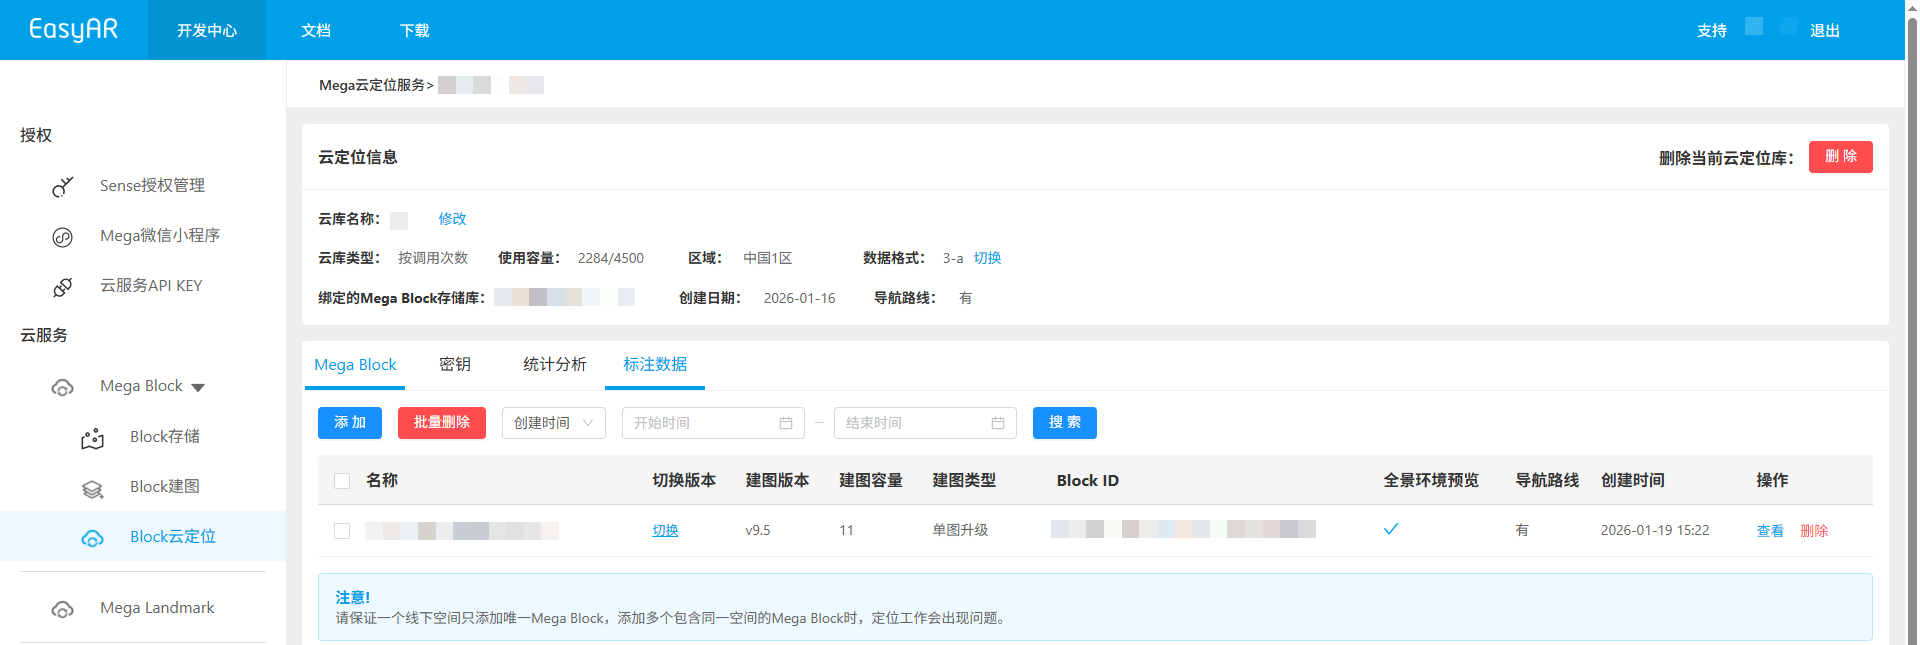
Handling addition failure: click the
Clear Taskbutton in the progress popup, and add the Block again.