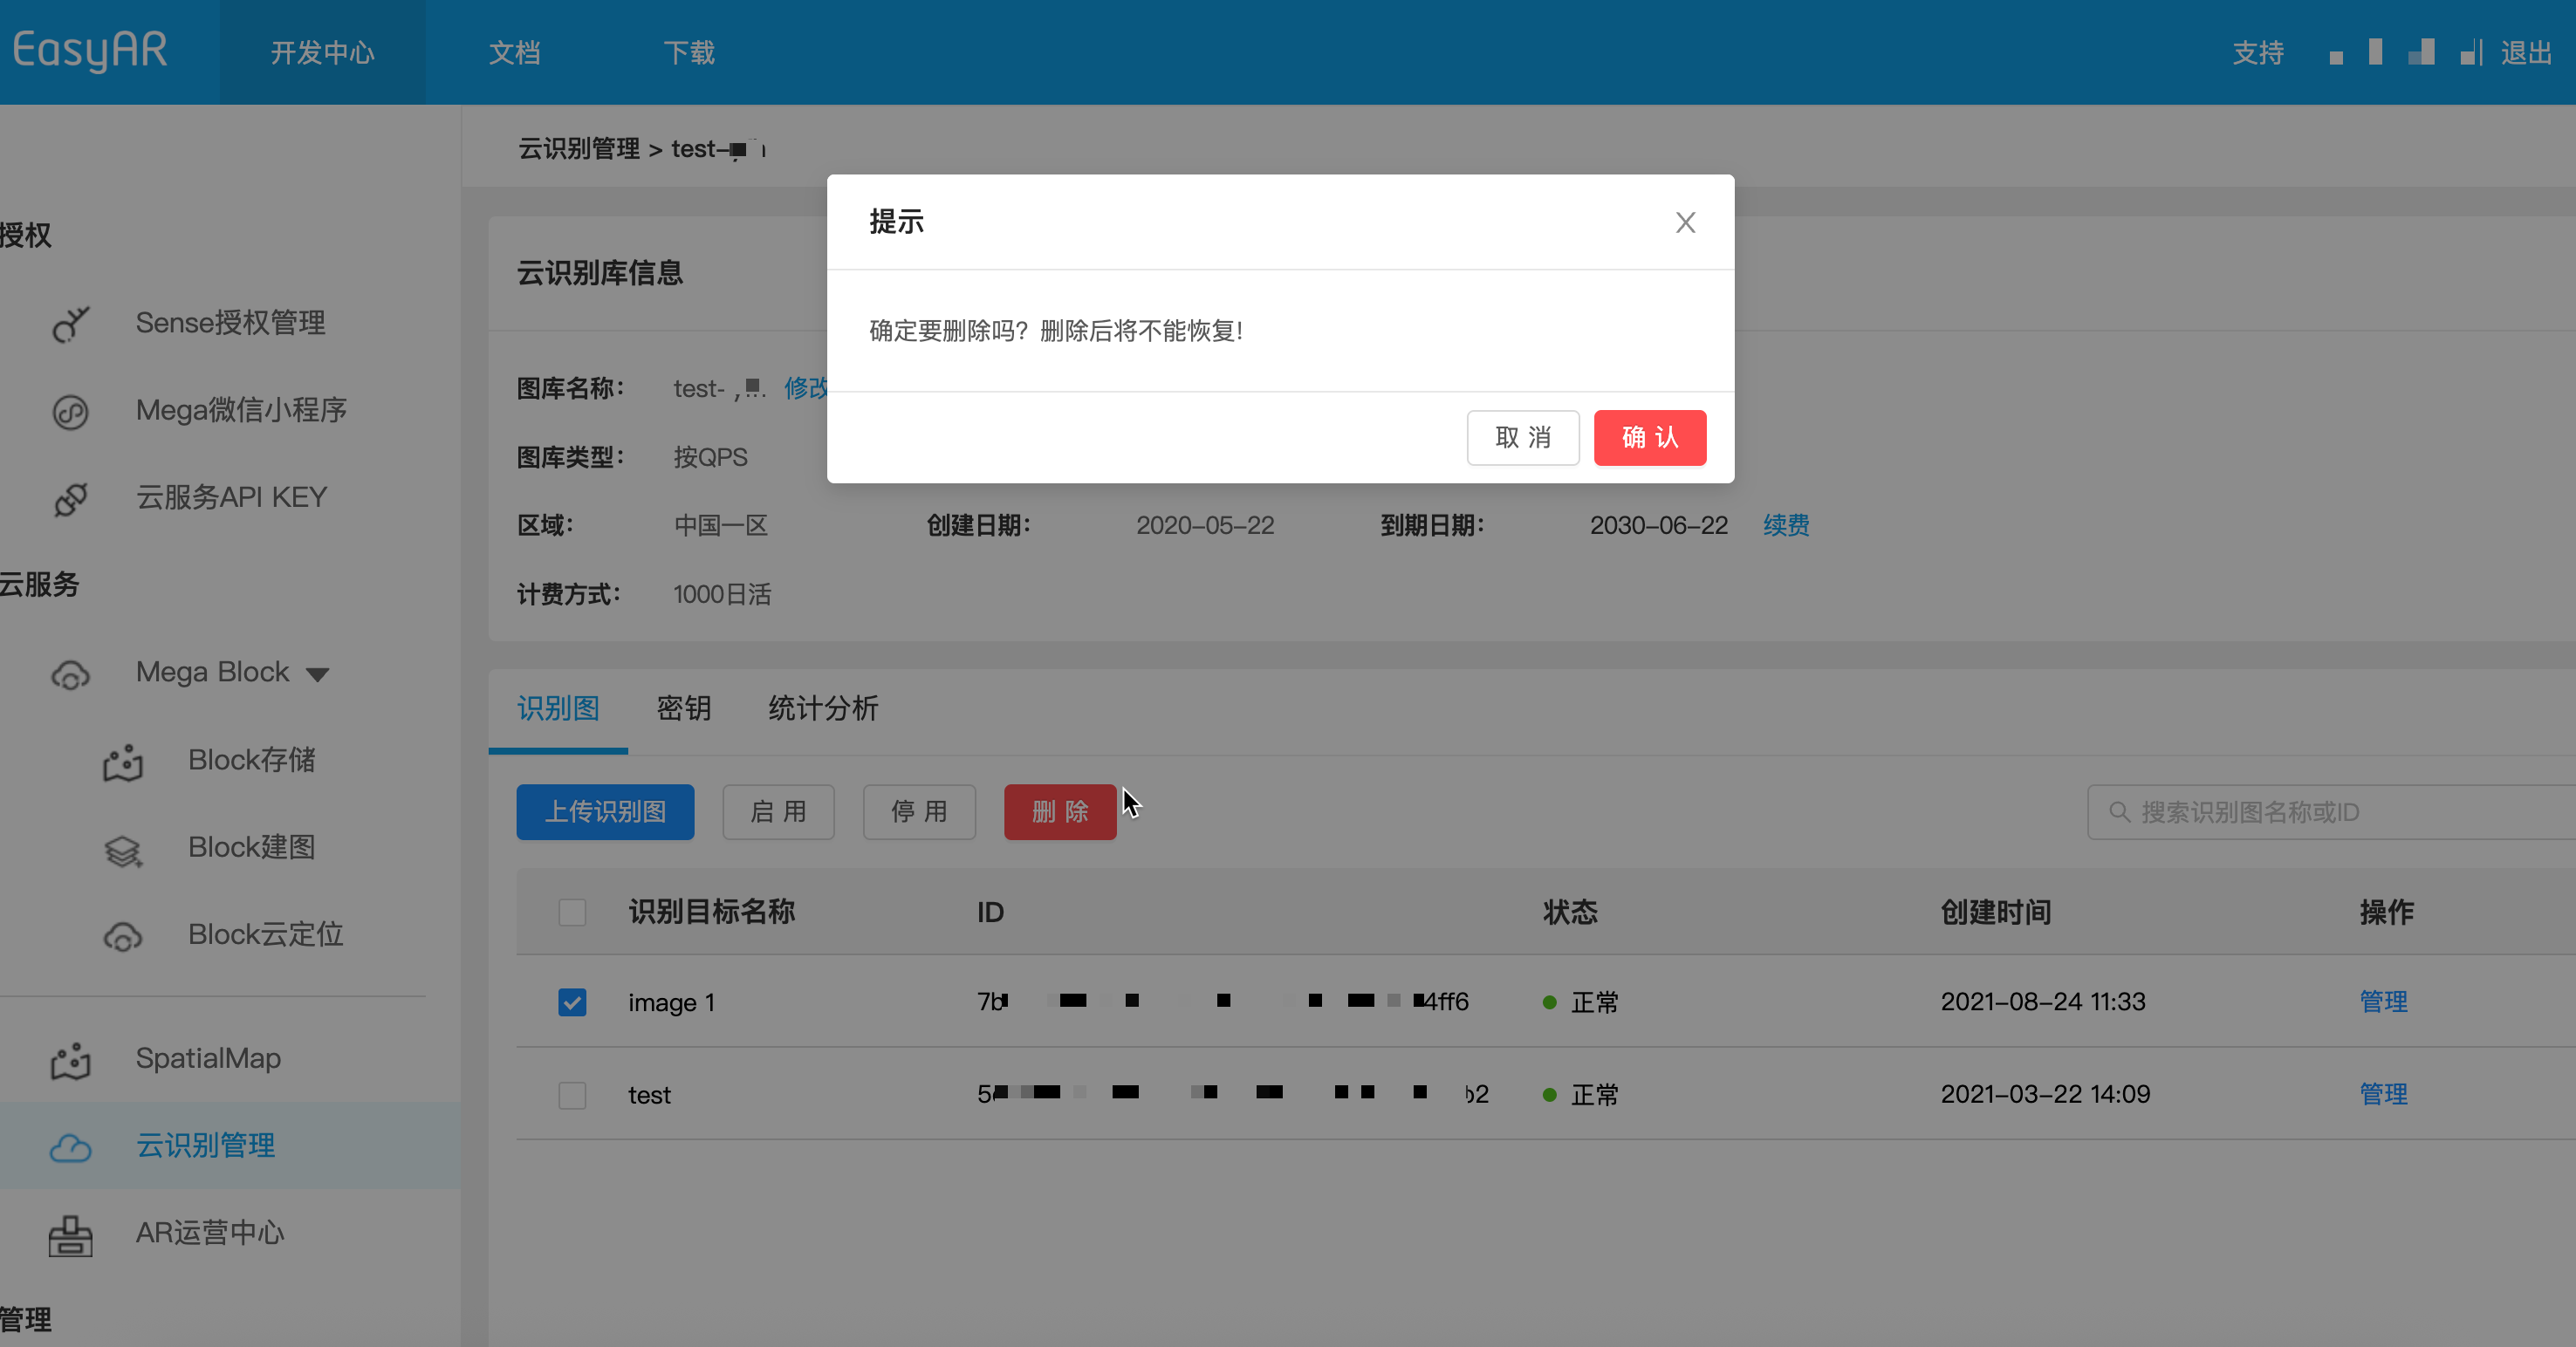
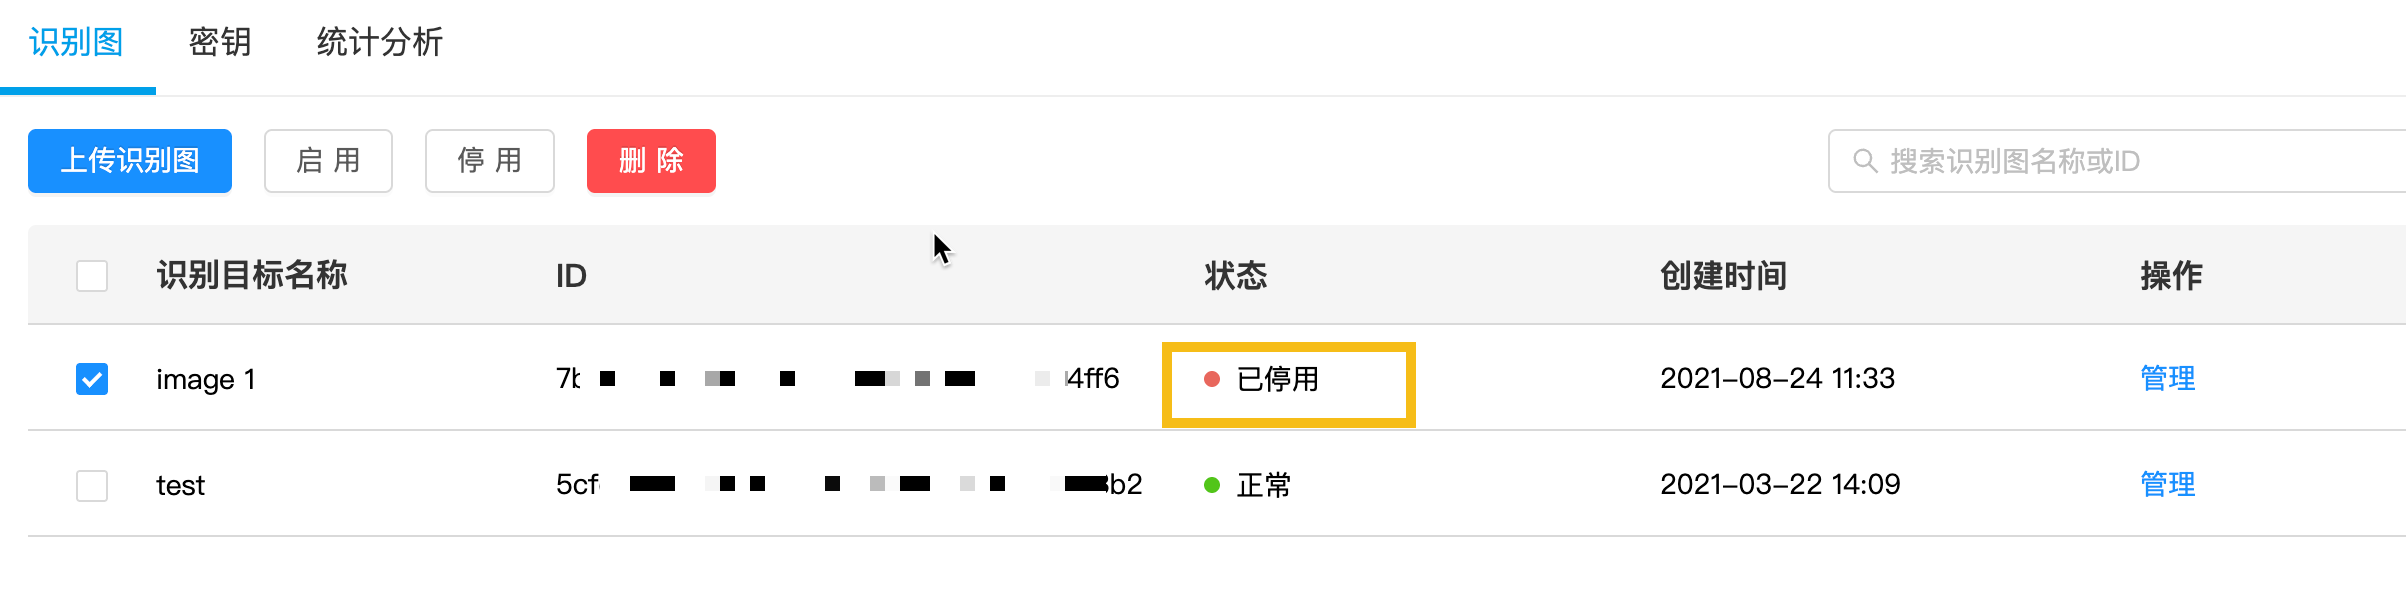
EasyAR ofrece dos formas de gestionar recognition images que ya no se necesitan: eliminación permanente y desactivación temporal. Para garantizar la estabilidad de los entornos production, se recomienda leer atentamente las siguientes instrucciones.
En la mayoría de escenarios de negocio, si no está seguro de si una imagen volverá a usarse en el futuro, se recomienda usar deactivation en lugar de deletion.
Las recognition images pueden limpiarse automáticamente mediante REST API.
Reemplace los marcadores de posición por los parámetros reales y ejecute el script curl
- Your-Server-side-URL → API Host real
- Your-Token → API Key Authorization Token real
- Your-CRS-AppId → su appId
- Your-todo-TargetId → targetId del target que se va a eliminar
curl -X DELETE "https://<Your Server-side-URL>/target/<Your-todo-TargetId>?appId=<Your-CRS-AppId>" \
  -H "Content-Type: application/json" \
  -H "Authorization: <Your-Token>"
Descargar el código de ejemplo Java
Importar el proyecto mediante Maven
Step 1. Abra el archivo de código relacionado RemoveTarget.java
Step 2. Modifique las variables globales y sustitúyalas por los parámetros de autenticación de su preparation checklist
- CRS AppId
- API Key / API Secret
- TARGET_MGMT_URL -> Server-end URL
- TARGET_ID -> targetId del target que se eliminará
public class RemoveTarget {

    private static final String TARGET_MGMT_URL = "https://cn1.crs.easyar.com";
    private static final String CRS_APPID       = "--here is your CRS AppId--";
    private static final String API_KEY         = "--here is your API Key--";
    private static final String API_SECRET      = "--here is your API Secret--";
    private static final String TARGET_ID       = "my_targetid";
    /* TO_DEL_IDs lists all the targetIds to be removed
     * must be separated by ","
     */
    private static final String TO_DEL_IDs = "targetId1,targetId2,targetId3";

    public String remove(Auth auth, String targetId) throws IOException {
        okhttp3.Request request = new okhttp3.Request.Builder()
                .url(auth.getCloudURL()+"/target/"+targetId+"?"+ Common.toParam(
                        Auth.signParam(new JSONObject(), auth.getAppId(), auth.getApiKey(), auth.getApiSecret())
                ))
                .delete()
                .build();
        return new OkHttpClient.Builder().build().newCall(request).execute().body().string();
    }

    public String removeMultiTargets(Auth auth, String targetIds) throws IOException {
        JSONObject params = new JSONObject().put("targetId", targetIds);
        Auth.signParam(params, auth.getAppId(), auth.getApiKey(), auth.getApiSecret());
        RequestBody requestBody = FormBody.create(MediaType.parse("application/json; charset=utf-8")
                , params.toString());
        okhttp3.Request request = new okhttp3.Request.Builder()
                .url(auth.getCloudURL() + "/targets")
                .delete(requestBody)
                .build();
        return new OkHttpClient.Builder().build().newCall(request).execute().body().string();
    }
    public static void main(String[] args) throws IOException{
        Auth accessInfo  =  new Auth(CRS_APPID, API_KEY, API_SECRET, TARGET_MGMT_URL);
        System.out.println(new RemoveTarget().remove(accessInfo, TARGET_ID));
        System.out.println(new RemoveTarget().removeMultiTargets(accessInfo, TO_DEL_IDs));
    }
}
Step 3. Ejecute Main
Descargue el código sample de NodeJS
Step 1. Configure el archivo de claves keys.json
- CRS AppId
- API Key / API Secret
- to-delete-targetId
{
  "appId": "--here is your appId for CRS App Instance for SDK 4--",
  "apiKey": "--here is your api key which is create from website and which has crs permission--",
  "apiSecret": "--here is your api secret which is create from website--"
}
Step 2. Ejecute y especifique el archivo de claves y Server-end URL
node bin/deleteTarget <to-delete-targetId> -t <Server-end-URL> -c keys.json
var argv = require('yargs')
    .usage('Usage: $0 [targetId] -t [host] -c [keys]')
    .demand(1)
    .default('t', 'http://localhost:8888').alias('t', 'host')
    .default('c', 'keys.json').alias('c', 'keys')
    .help('h').alias('h', 'help')
    .epilog('copyright 2015, sightp.com')
    .argv;

var fs = require('fs');

var targetId = argv._[0];
var host = argv.host;
var keys = JSON.parse(fs.readFileSync(argv.keys));

var farmer = require('../farmer')(host, keys.appKey, keys.appSecret);

farmer.deleteTarget(targetId)
.then(function(resp) {
    console.log(resp.result.targetId);
})
.fail(function(err) {
    console.log(err);
});
deleteTarget llama a la API del servicio cloud. El código sample está en farmer.js.
function deleteTarget(targetId) {
    return Q.promise(function(resolve, reject) {
        request.del(host + '/target/' + targetId)
        .query(signParams())
        .end(done(resolve, reject));
    });
}
Descargue el código de ejemplo PHP.
Step 1. Abra el código de entrada demo.php.
Step 2. Modifique las variables globales y sustitúyalas por los parámetros de autenticación de su lista preparada.
- CRS AppId
- API Key / API Secret
- Server-end URL
- toDeleteTargetId
<?php
include 'EasyARClientSdkCRS.php';
$apiKey = 'API Key';
$apiSecret = 'API Secret';
$crsAppId = 'CRS AppId'
$crsCloudUrl = 'https://cn1-crs.easyar.com';
$toDeleteTargetId = 'to-delete-targetId';

$sdk = new EasyARClientSdkCRS($apiKey, $apiSecret, $crsAppId, $crsCloudUrl);

$rs = $sdk->delete($toDeleteTargetId);
if ($rs->statusCode == 0) {
  print_r($rs->result);
} else {
  print_r($rs);
}
Step 3. Ejecute php demo.php.
Cree el archivo de codigo relacionado delete_target.py, modifique las variables globales y luego ejecute
pip install requests
python delete_target.py
import time
import hashlib
import requests

# --- configuracion de variables globales ---
API_KEY = "YOUR_API_KEY"
API_SECRET = "YOUR_API_SECRET"
APP_ID = "YOUR_APP_ID"
HOST = "https://crs-cn1.easyar.com"
TARGET_ID = "TARGET_ID"

def main():
    timestamp = str(int(time.time() * 1000))

    params = {
        'apiKey': API_KEY,
        'appId': APP_ID,
        'timestamp': timestamp
    }

    sorted_keys = sorted(params.keys())
    sign_str = "".join([f"{k}{params[k]}" for k in sorted_keys]) + API_SECRET
    signature = hashlib.sha256(sign_str.encode('utf-8')).hexdigest()

    url = f"{HOST}/target/{TARGET_ID}"
    final_params = {**params, 'signature': signature}

    print(f"Requesting DELETE {url}...")
    response = requests.delete(url, params=final_params)
    print(f"Response: {response.text}")

if __name__ == "__main__":
    main()
Cree el archivo de código relacionado main.go, modifique las global variables y luego ejecute
go run main.go
main.go:
package main
import (
"crypto/sha256"
"fmt"
"io"
"net/http"
"sort"
"strconv"
"time"
)
var (
ApiKey = "YOUR_API_KEY"
ApiSecret = "YOUR_API_SECRET"
AppId = "YOUR_APP_ID"
Host = "https://crs-cn1.easyar.com"
TargetId = "TARGET_ID"
)
func main() {
ts := strconv.FormatInt(time.Now().UnixNano()/1e6, 10)
params := map[string]string{
"apiKey": ApiKey,
"appId": AppId,
"timestamp": ts,
}
keys := make([]string, 0, len(params))
for k := range params { keys = append(keys, k) }
sort.Strings(keys)
builder := ""
for _, k := range keys { builder += k + params[k] }
builder += ApiSecret
signature := fmt.Sprintf("%x", sha256.Sum256([]byte(builder)))
url := fmt.Sprintf("%s/target/%s?apiKey=%s&appId=%s×tamp=%s&signature=%s",
Host, TargetId, ApiKey, AppId, ts, signature)
req, _ := http.NewRequest("DELETE", url, nil)
resp, _ := http.DefaultClient.Do(req)
defer resp.Body.Close()
body, _ := io.ReadAll(resp.Body)
fmt.Printf("Response: %s
", string(body))
}
Añada las dependencias reqwest, tokio, sha2 y hex en Cargo.toml.
Ejecute cargo run.
use sha2::{Sha256, Digest};
use std::collections::BTreeMap;
use std::time::{SystemTime, UNIX_EPOCH};
const API_KEY: &str = "YOUR_API_KEY";
const API_SECRET: &str = "YOUR_API_SECRET";
const APP_ID: &str = "YOUR_APP_ID";
const HOST: &str = "https://crs-cn1.easyar.com";
const TARGET_ID: &str = "YOUR_TARGET_ID";
#[tokio::main]
async fn main() -> Result<(), Box<dyn std::error::Error>> {
let ts = SystemTime::now().duration_since(UNIX_EPOCH)?.as_millis().to_string();
let mut params = BTreeMap::new();
params.insert("apiKey", API_KEY);
params.insert("appId", APP_ID);
params.insert("timestamp", &ts);
let mut sign_str = String::new();
for (k, v) in ¶ms {
sign_str.push_str(k);
sign_str.push_str(v);
}
sign_str.push_str(API_SECRET);
let mut hasher = Sha256::new();
hasher.update(sign_str.as_bytes());
let signature = hex::encode(hasher.finalize());
let url = format!("{}/target/{}?apiKey={}&appId={}×tamp={}&signature={}",
HOST, TARGET_ID, API_KEY, APP_ID, ts, signature);
let res = reqwest::Client::new().delete(url).send().await?;
println!("Response: {}", res.text().await?);
Ok(())
}
Cree un proyecto de consola .NET.
dotnet new console
dotnet run
using System;
using System.Collections.Generic;
using System.Linq;
using System.Security.Cryptography;
using System.Text;
using System.Net.Http;

class Program {
    static string API_KEY = "API_KEY";
    static string API_SECRET = "API_SECRET";
    static string APP_ID = "APP_ID";
    static string HOST = "https://crs-cn1.easyar.com";
    static string TARGET_ID = "TARGET_ID";

    static async System.Threading.Tasks.Task Main() {
        string timestamp = DateTimeOffset.Now.ToUnixTimeMilliseconds().ToString();

        var dict = new SortedDictionary<string, string> {
            { "apiKey", API_KEY },
            { "appId", APP_ID },
            { "timestamp", timestamp }
        };

        StringBuilder sb = new StringBuilder();
        foreach (var kv in dict) sb.Append(kv.Key).Append(kv.Value);
        sb.Append(API_SECRET);

        string signature = Sha256(sb.ToString());

        using var client = new HttpClient();
        string query = string.Join("&", dict.Select(x => $"{x.Key}={x.Value}")) + $"&signature={signature}";
        string url = $"{HOST}/target/{TARGET_ID}?{query}";

        var response = await client.DeleteAsync(url);
        Console.WriteLine($"Result: {await response.Content.ReadAsStringAsync()}");
    }

    static string Sha256(string str) {
        byte[] bytes = SHA256.HashData(Encoding.UTF8.GetBytes(str));
        return BitConverter.ToString(bytes).Replace("-", "").ToLower();
    }
}
- Entorno de ejecución
- Unity 2020 LTS o posterior
- Scripting Backend: se admiten Mono e IL2CPP
- API Compatibility Level: .NET Standard 2.1 (recomendado)
Step 1: Prepare el archivo de imagen
- Cree un directorio en el proyecto Unity:
Assets/
└── Scripts/
     └── DeleteImageTarget.cs
using System.Collections;
using UnityEngine;
using UnityEngine.Networking;

public class DeleteImageTarget : MonoBehaviour
{
    [Header("Config")]
    public string targetId = "Your targetId";
    public string apiBaseUrl = "https://Your-Server-end-URL";
    public string authorizationToken = "YOUR API KEY AUTH TOKEN";
    public string crsAppId = "CRS-AppId";

    private void Start()
    {
        StartCoroutine(DeleteTarget());
    }

    private IEnumerator DeleteTarget()
    {

        string url =
            $"{apiBaseUrl}/target/{targetId}?appId={crsAppId}";

        UnityWebRequest request = UnityWebRequest.Delete(url);
        request.downloadHandler = new DownloadHandlerBuffer();

        request.SetRequestHeader("Content-Type", "application/json");
        request.SetRequestHeader("Authorization", authorizationToken);

        yield return request.SendWebRequest();

        if (request.result == UnityWebRequest.Result.Success)
        {
            Debug.Log("Delete target success:");
            Debug.Log(request.downloadHandler.text);
        }
        else
        {
            Debug.LogError("Delete target failed:");
            Debug.LogError(request.error);
            Debug.LogError(request.downloadHandler.text);
        }
    }
}
Step 3: Configure los parámetros (Inspector)
Modifique en el panel Inspector:
- Api Url
- Authorization Token
- Crs App Id
- Target Id: targetId de la imagen objetivo que se va a eliminar
Solo necesita modificar estos elementos para ejecutar, rellenando los parámetros preparados en la checklist de preparación
Step 4: Ejecutar
- Haga clic en Play
- Consulte el resultado en Console:
- Correcto: devuelve JSON (incluye targetId)
- Fallo: HTTP / información de error