Unity 의 Mega Studio 를 사용하여 3D content 배치하는 방법
이 문서는 Unity editor 에서 annotation tool 을 사용해 model placement 를 수행하고, 이후 xr-frame 에서 rendering 하기 위한 준비 방법을 빠르게 안내합니다.
시작하기 전에
- Unity 에서 Mega Studio 사용할 수 있어야 합니다
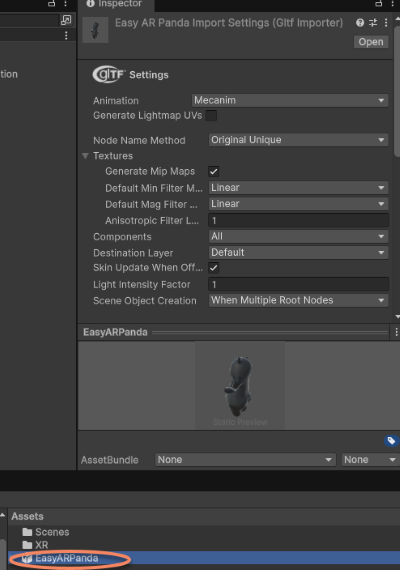
GLTF model 준비 후 Unity Assets 로 드래그
sample project 에서 사용한 model(귀여운 판다)을 사용하거나, official xr-frame Demo 에서 사용한 small robot model을 사용할 수 있습니다. 또는 xr-frame 이 load 가능한 GLTF formats 및 supported extensions를 참고하여 직접 model 을 준비하고 resource hosting server 에 upload 할 수 있습니다.
팁
Mega plugin 에는 com.unity.cloud.gltfast에 대한 dependency 가 이미 추가되어 있으므로, model files 를 Unity Assets 로 직접 drag 할 수 있습니다.
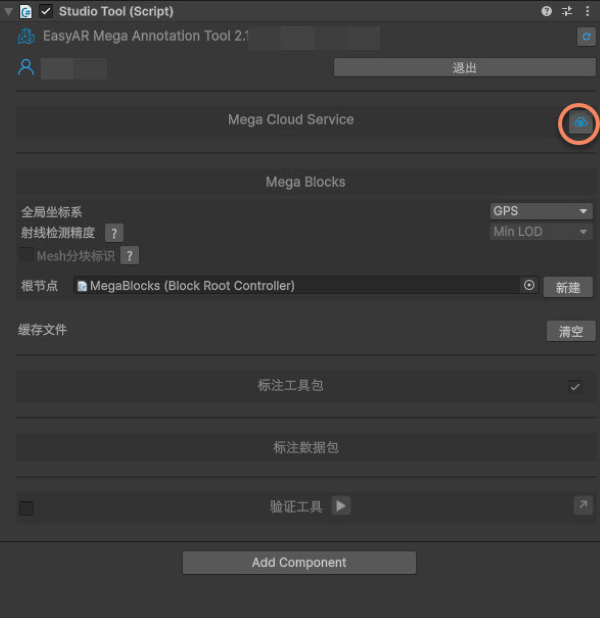
Mega cloud localization library 선택
Mega Cloud Service 오른쪽의 icon 을 클릭합니다.
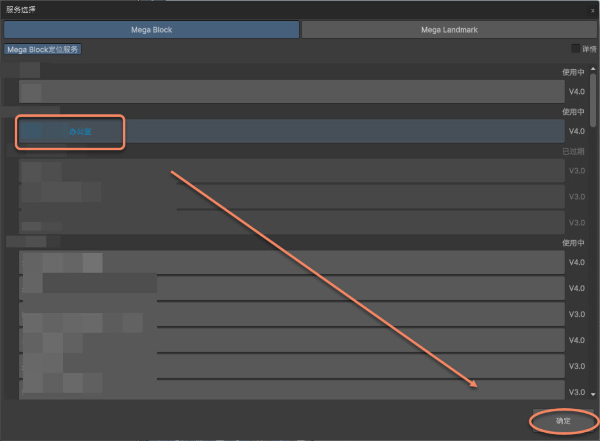
사용할 library 를 선택합니다.
localization library 및 Mega Blocks information 을 성공적으로 load 하면 Studio tool panel 이 그림과 같이 표시됩니다.
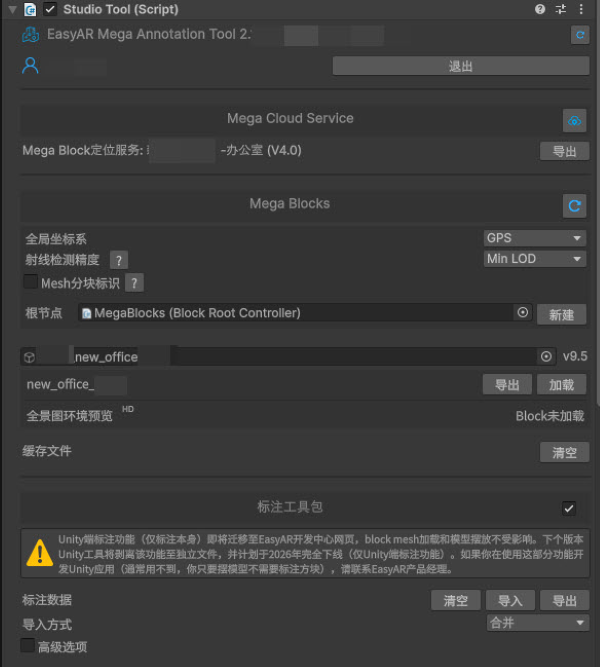
Block dense model load
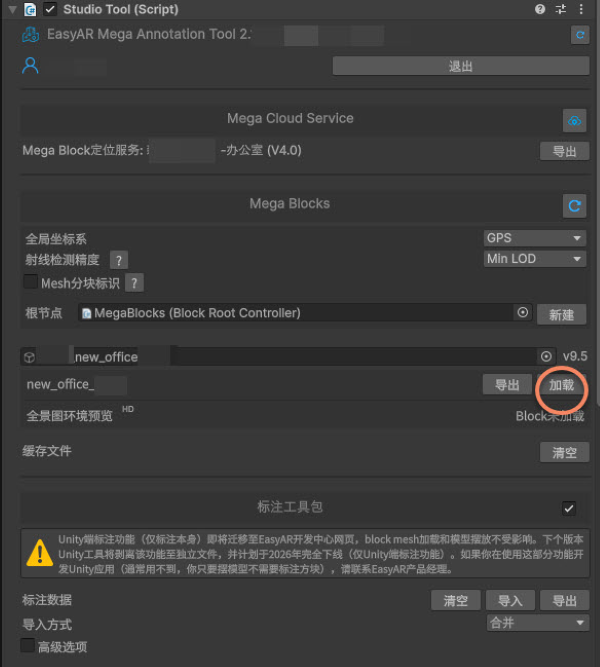
Block 이름 오른쪽의 Load 를 클릭하면 해당 Block 의 dense model 을 dynamic 하게 load 할 수 있습니다.
Annotation 생성
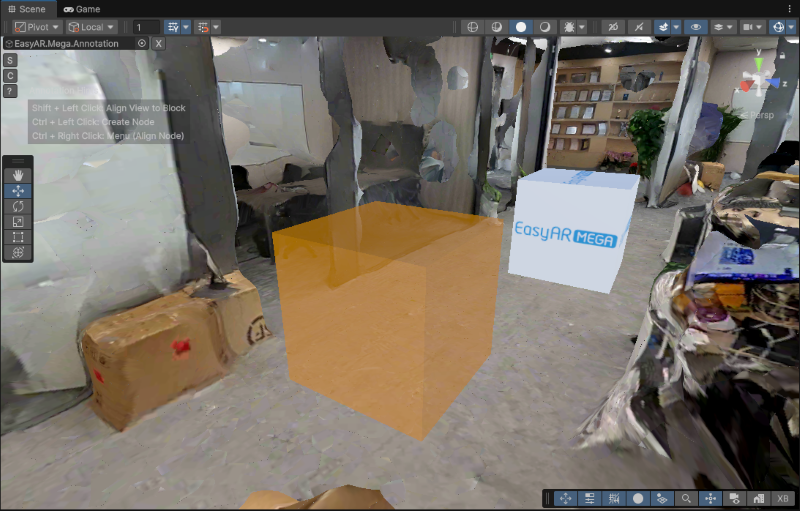
scene 에서 Ctrl(Windows) / Command(Mac) 키를 누른 채 annotation 이 필요한 ground 를 left-click 합니다.
3D content 를 annotation 의 child node 로 사용
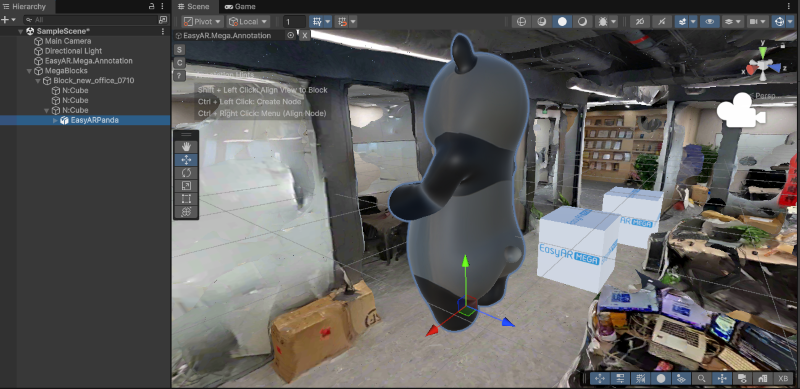
import 한 model 을 scene node 로 drag 하여 annotation 의 child node 로 둡니다.
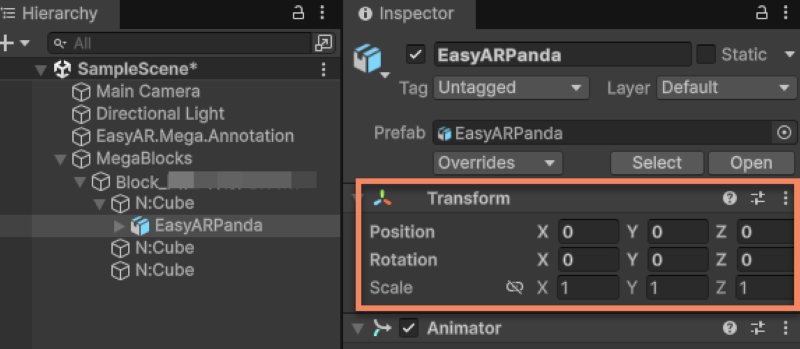
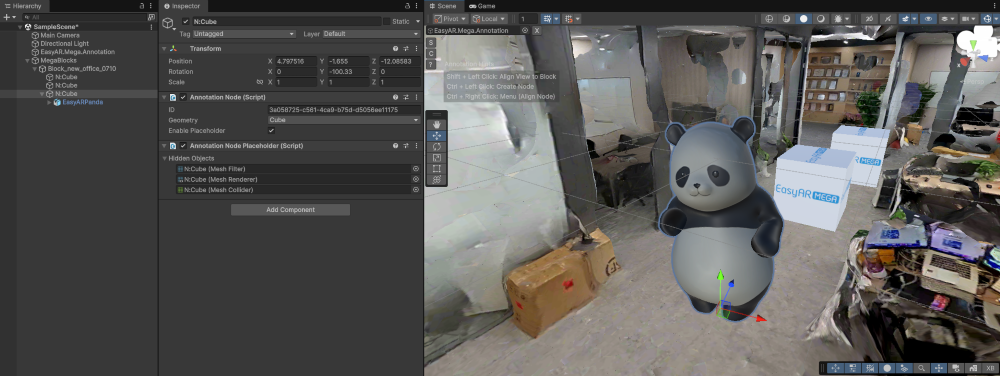
model Inspector panel 의 Position 과 Rotation 을 모두 0 으로 변경합니다. Scale 은 필요에 따라 조정할 수 있습니다.
참고
EMA 는 모든 coordinate conversion logic 을 담당합니다. model Position 과 Rotation 을 0 으로 설정하는 것은 model 의 geometric center 를 annotation point 와 완전히 일치시키기 위함입니다. 모든 translation 및 rotation adjustment 는 parent node(annotation node)를 조작하여 완료해야 합니다.
[Optional] Model position 조정
scene 에서 annotation node 를 선택하고 dense model 을 기준으로 model 의 position 과 rotation 을 조정합니다.
참고
annotation 에 대한 model 의 Position 과 Rotation 은 항상 모두 0 이어야 합니다. 그렇지 않으면 xr-frame 에서 올바른 rendering result 를 얻을 수 없습니다.
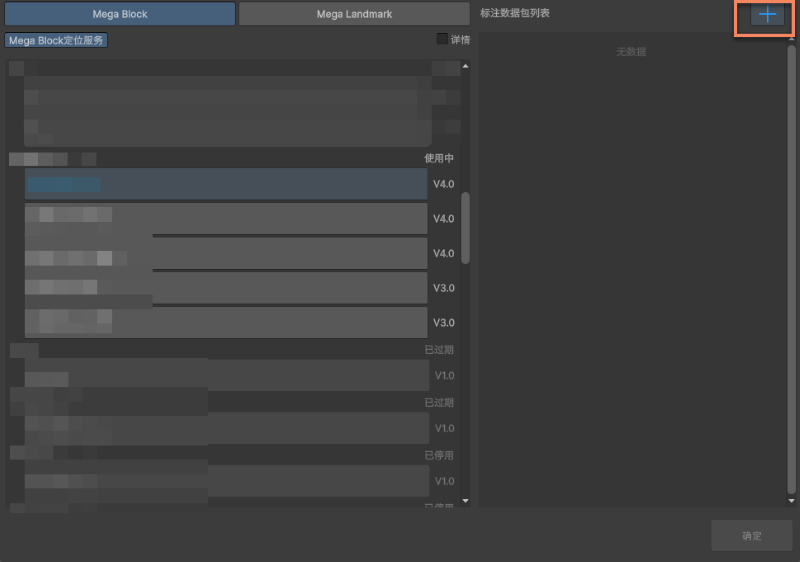
새 annotation data package 만들기
Inspector panel 의 annotation data package 오른쪽 icon 을 클릭합니다.
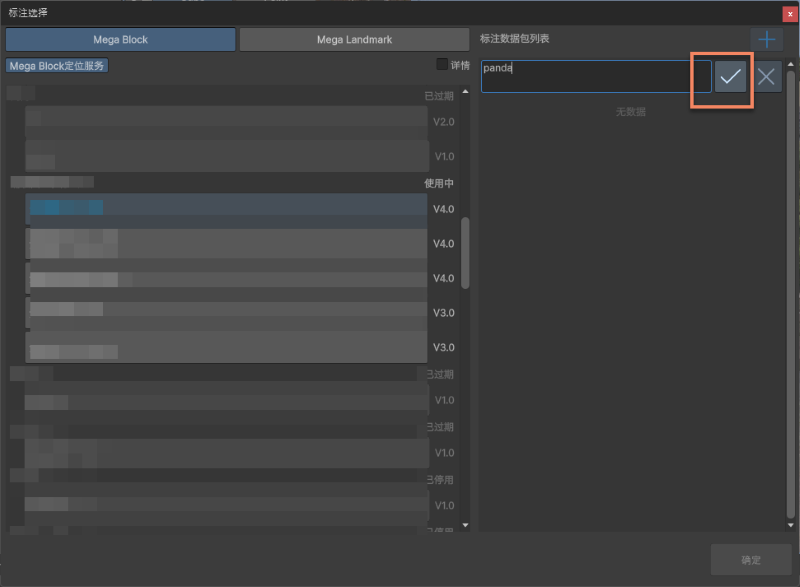
상자에 annotation data 이름을 입력하고 오른쪽 체크 표시를 클릭합니다.
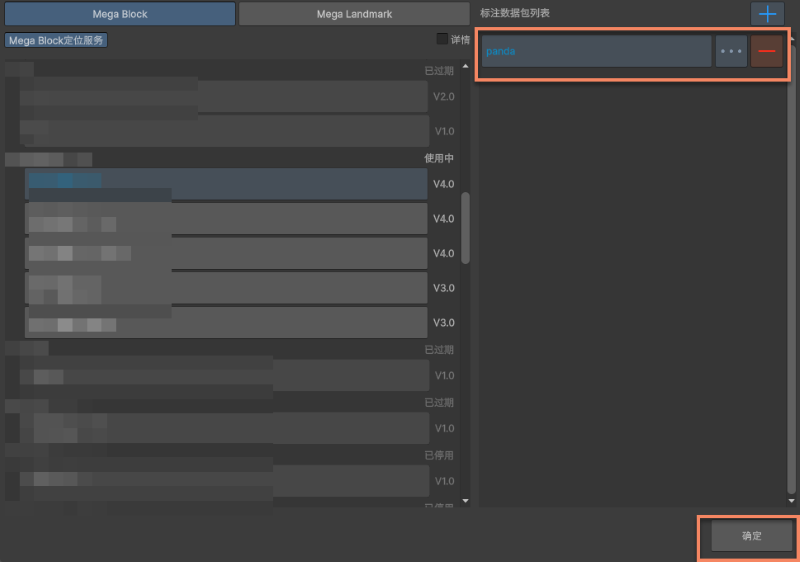
생성에 성공하면 그림과 같이 표시됩니다. 이후 아래의 OK 를 클릭합니다.
upload icon 을 클릭하여 upload 합니다.
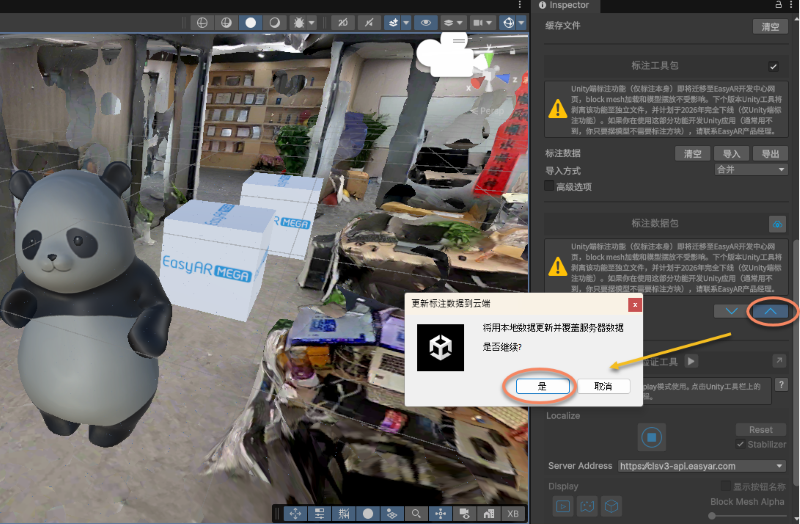
upload 성공 후 prompt 가 표시됩니다.
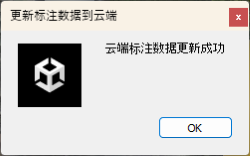
Annotation data 확인
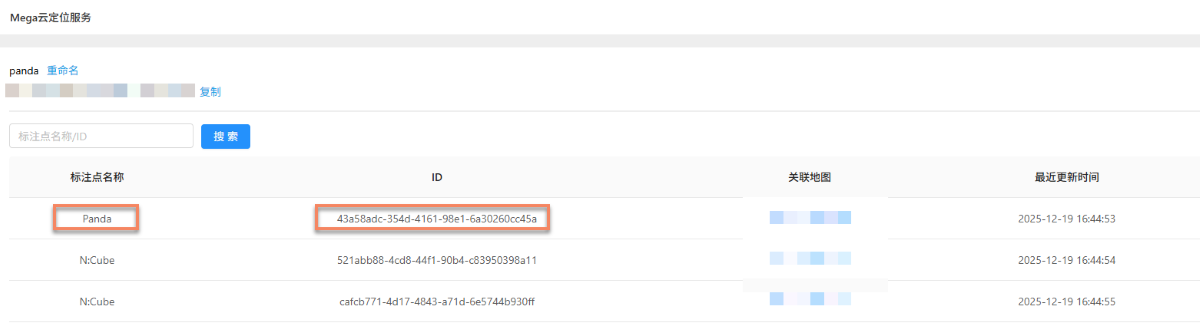
xr-frame 에서 해당 annotation data 를 load 하기 위해 annotation data 의 ID 를 기록해야 합니다.
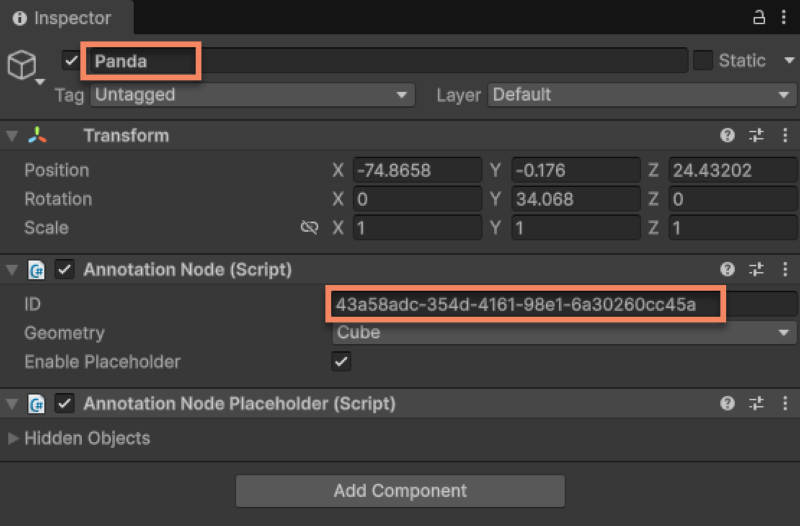
upload 성공 후 cloud localization library 에서도 해당 정보를 확인할 수 있습니다. 이 페이지 목록의 ID 는 annotation data package ID 입니다.
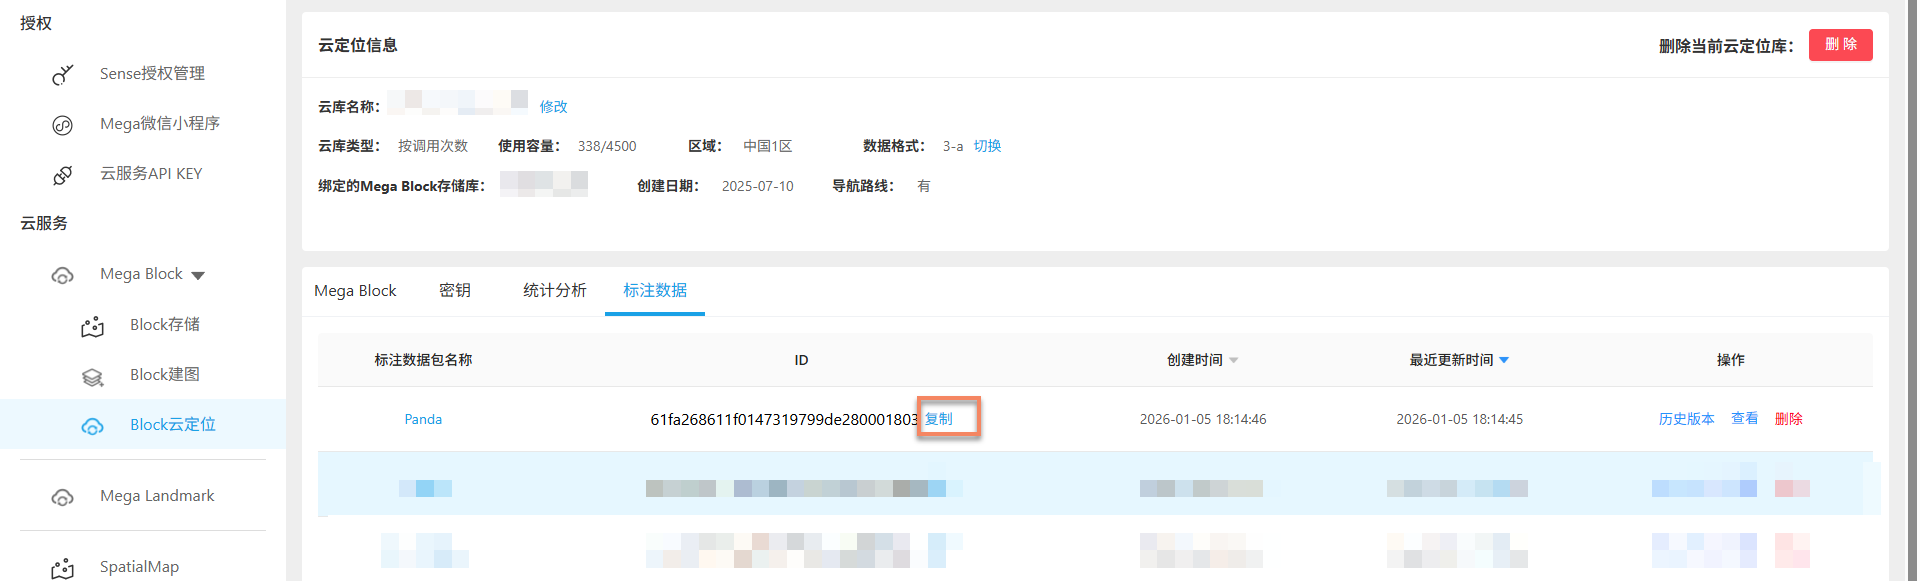
여기서 upload 한 annotation data name 과 ID 도 확인할 수 있습니다. 이 페이지 목록의 ID 는 annotation point ID 입니다.
다음 단계
- upload 한 annotations 를 사용하여 complete sample project 실행
- Unity editor 를 사용하여 real world 와 정렬된 3D content 생성 시도