Simulation run
Overlay rendering is one of the core functions of Mega, effectively handling physical occlusion, deep fusion, and lighting consistency issues in complex scenes, thereby ensuring virtual objects seamlessly integrate visually with the real environment. This feature is suitable for use before development, when application development is incomplete, or when on-site testing conditions are inconvenient.
Preparations
Mega Studio is a Unity development component provided by EasyAR, containing map browsing and localization simulation functions, specifically including Block Viewer for Unity Developer, Block Viewer, and Annotation Tool tools. If you have already installed Mega Studio, you can skip this step.
Download mega studio
Mega Studio is provided in the form of a Unity plugin. You need to download EasyAR Sense Unity Plugin (for Mega) from the EasyAR download page, and then import it into Unity for use.
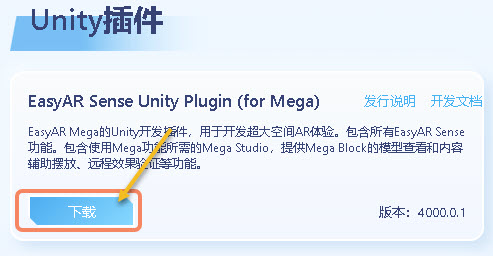
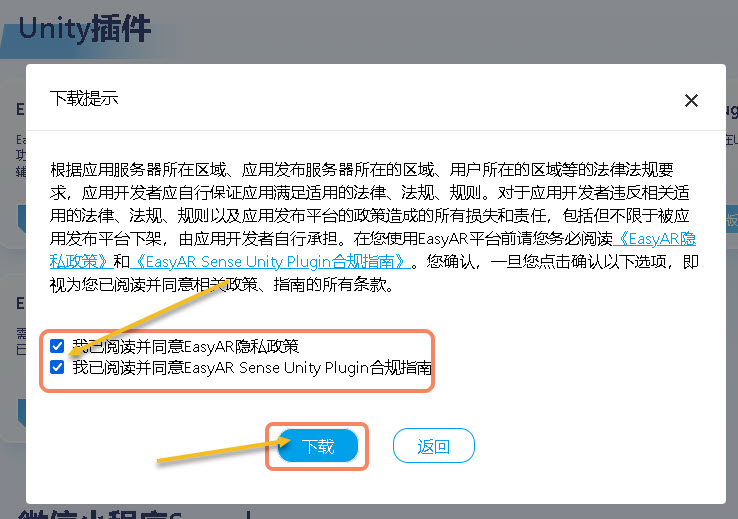
When downloading, you need to agree to the "Privacy Policy" and "Compliance Guidelines", and click "Download"
Unzip the file, extracting the downloaded file into the structure shown below

Create unity project
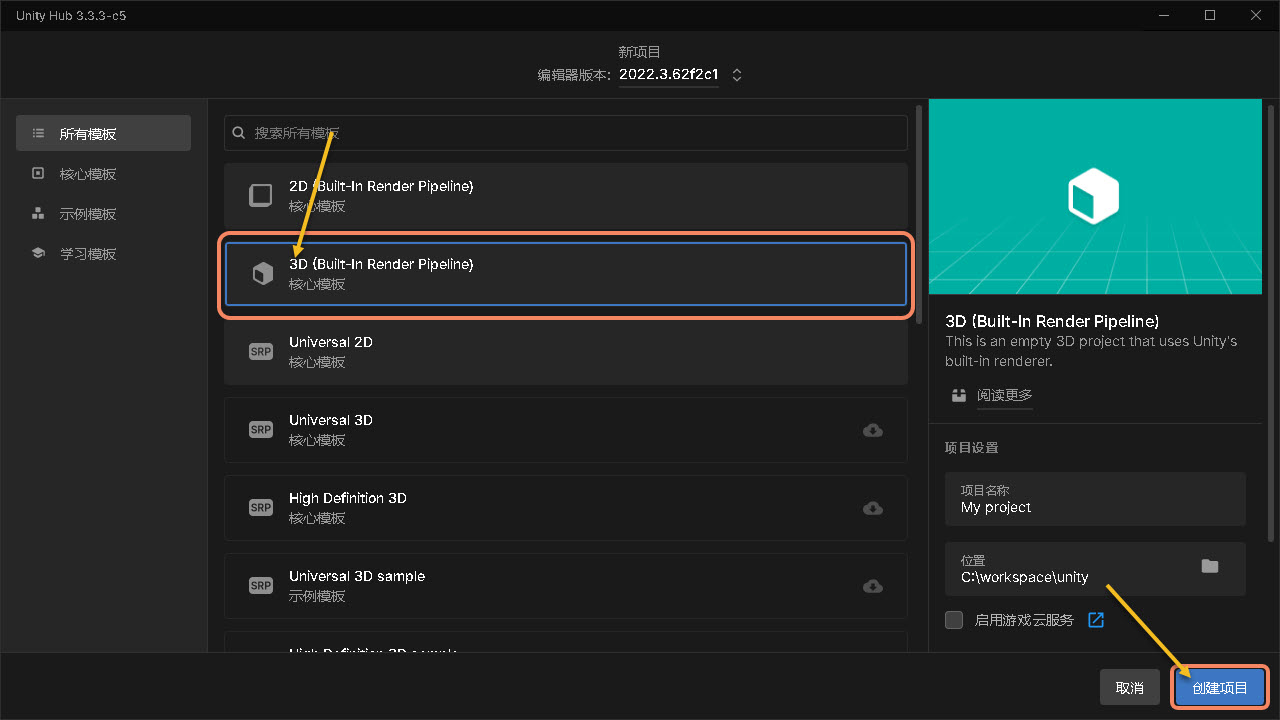
Run Unity and create a project.
Click "New Project"
Select "3D(Built-In Render Pipeline)",
Click "Create Project"

Tip
Versions after Unity 6000 require downloading the 3D (Built-In Render Pipeline) component first
Install mega studio
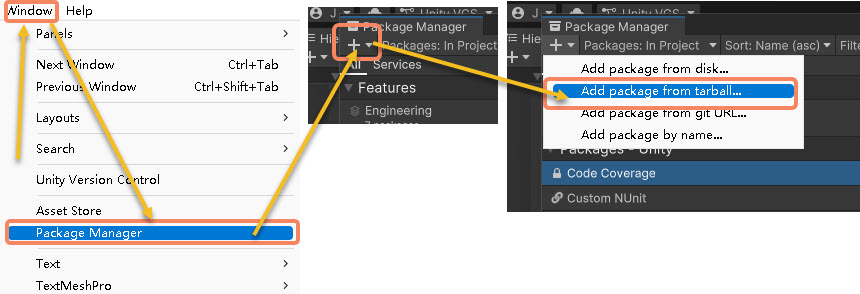
Click "Window" in the menu bar
Select "Package Manager"
In the pop-up window, click the "+" symbol in the upper-left corner
Select "Add package from tarball..."
Install the sense and mega packages in sequence
After successful installation, it should look like the image below
Start simulation run
Simulation localization testing allows you to directly view overlay rendering effects without full application development. By replaying EIF data in Mega Studio, sending localization requests, and overlaying rendering Mesh, you can preview localization results. The specific operation process is as follows:
Load map
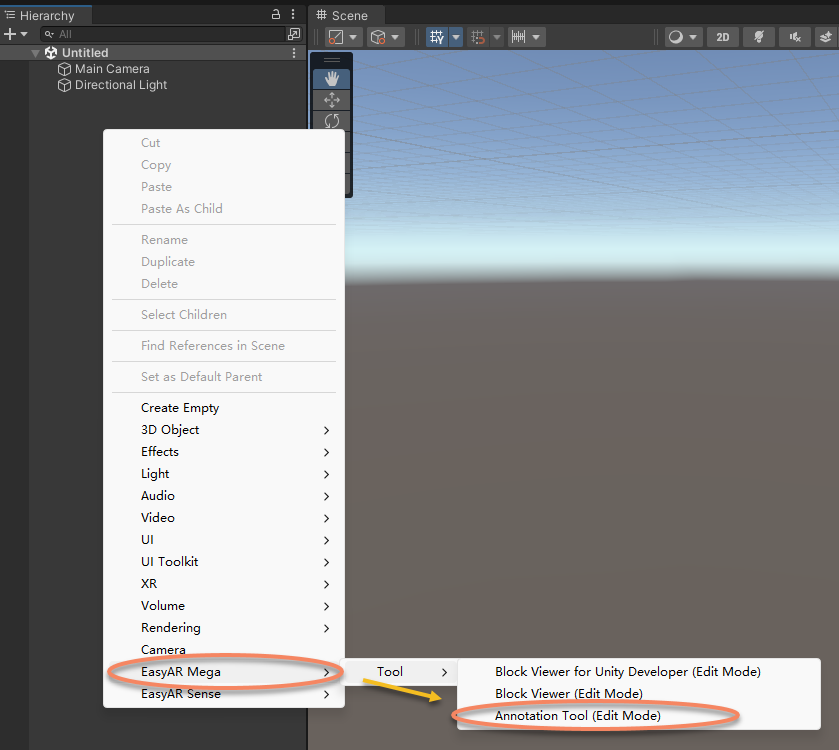
Right-click in the blank area of the left panel "Hierarchy", select "EasyAR Mega" -> "Tool" -> import "Annotation Tool (Edit Mode)"
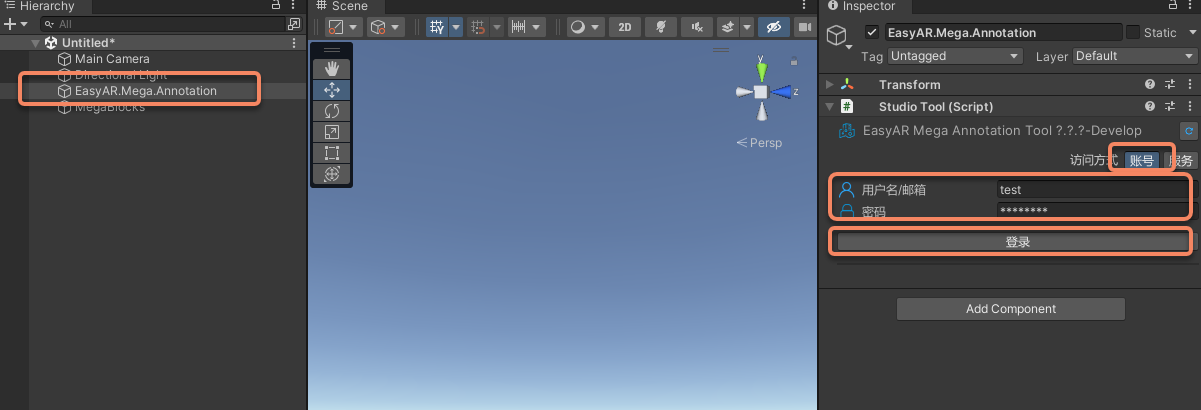
Select "EasyAR.Mega.Annotation" in the left panel "Hierarchy"
In the right panel "Inspector", select
Account, enter EasyAR account name and passwordClick "Login"
If you need to use service login, you can refer to Unity login component.
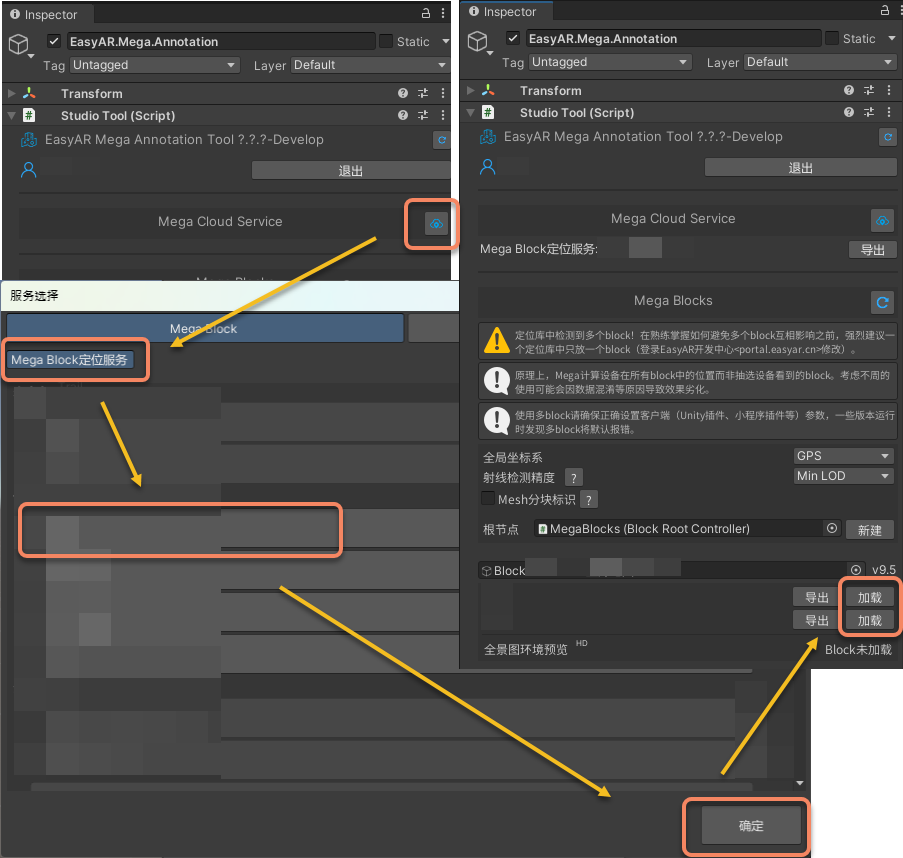
In the right panel "Inspector", click the icon after "Mega Cloud Service"
In the opened window, select a "Mega Block localization service", click "OK"
In the right panel "Inspector", click "Load" to add the map to the Unity project
Load eif
As shown in the figure below, click "EasyAR.Mega.Annotation" in the left panel "Hierarchy", then in the right panel "Inspector", click "2" to check the verification tool, then click button "3" to play.
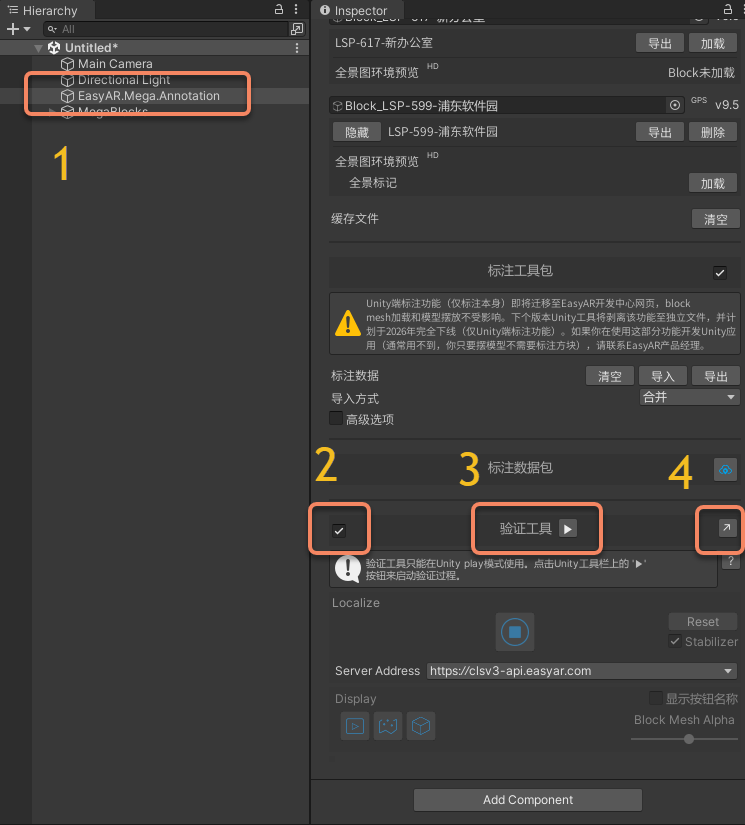
After clicking tab "4", the "Mega Validation Tool" window will be displayed separately.
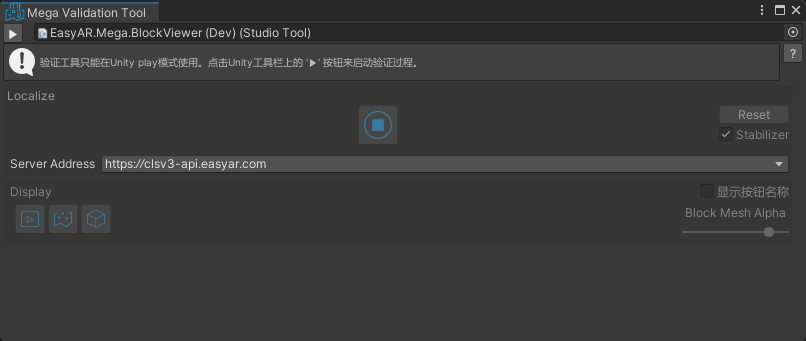
Click the load button as shown below, select the EIF file for your test, and click "Open" to automatically play the EIF and view localization effects.

Run effect and control
After loading EIF, "EasyAR.Mega.Annotation" will automatically play EIF and perform localization. You can view the overlay effect of Mesh in Game.
You can adjust model rendering transparency to view localization effects. You can also drag the progress bar to adjust the start time of playback.
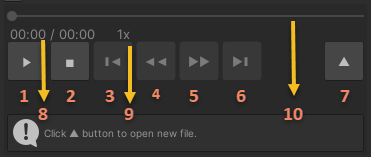
Function description
- Play/Pause
- Stop
- Forward 5s (available for new format data, except when recording abnormally stops)
- Slow down playback (available for new format data)
- Speed up playback (available for new format data)
- Backward 5s (available for new format data, except when recording abnormally stops)
- Open EIF file
- Current time/Total time
- Current speed
- Playback progress (draggable for new format data, except when recording abnormally stops)
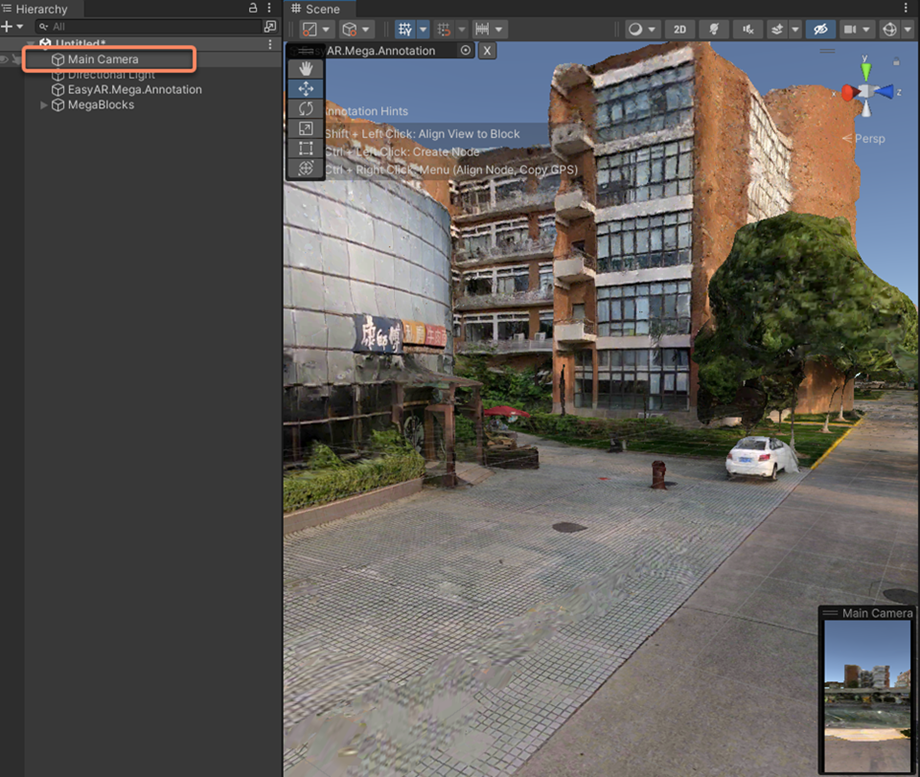
You can also click "Main Camera" in "Hierarchy" to view the real-time position of the camera during localization.
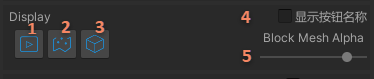
In the localization display control area, you can view localization status:
Show/Hide video background
Show/Hide annotation data
Show/Hide Block model (in URP, the model in Scene window will also be hidden)
Show/Hide button names
Control Block model transparency (not available in URP)
[Optional] Use lcc 3d gaussian splatting
Note
This section applies to usage scenarios where the domain device is used for collection and mapping is completed. Mapping results from other devices do not contain LCC 3DGS data.
If you use the LCC 3D Gaussian Splatting (domain LCC) function, you can simultaneously render 3DGS results during simulation to view the alignment effect between the model and 3DGS.
First, you need to load LCC data and align it with Mesh.
If there is a SceneGameCameraSync script on the Camera, you need to Disable it.
The effect of simulating operation by rendering 3DGS while playing the EIF file is as follows:
Next steps
- If you need to experience richer simulation runs, you can refer to how to add virtual content during simulation run
- For a more detailed operation manual, you can refer to annotation tool component