EasyAR Mega를 사용한 오클루전 구현
오클루전(Occlusion)은 AR 가상-실제 융합의 몰입감을 향상시키는 핵심 기술입니다. 이 문서는 xr-frame 환경에서 EasyAR 클라우드 위치 추적 및 어노테이션을 통해 오클루전 효과를 구현하는 방법을 안내합니다.
시작하기 전에
- Unity에서 Mega Studio 사용하기가 가능해야 합니다.
- Unity 에디터로 어노테이션 생성 및 업로드가 가능해야 합니다.
- 실제 환경과 정렬된 콘텐츠 생성이 가능해야 합니다.
오클루전 구현 방식
- 오프라인 모델링: Unity 에디터에서 Block 좌표계를 기반으로 실제 벽, 기둥, 대형 장비 등에 정확히 매칭되는 기하체 생성. 또는 Block 밀집 모델을 절단 및 면 감소 처리하여 최적화된 모델 확보.
- 런타임 정렬: xr-frame 런타임에 클라우드 위치 추적으로 Block 좌표계와 실제 공간 정렬, 해당 기하체 로드.
- 머티리얼 교체: 해당 기하체에 특수 오클루전 머티리얼 적용.
- 시각적 효과: GPU가 다른 가상 객체를 렌더링할 때, 깊이 테스트 실패로 가려진 부분의 픽셀을 자동으로 제거하여 가상 객체가 실제 물리 공간의 오클루전 논리를 따르도록 함.
간단한 기하체 오클루전 배치 방법
밀집 모델 및 파노라마 뷰를 참고하여 큐브 어노테이션을 정확히 배치합니다. 배치 후 어노테이션은 "벽"이나 "기둥"처럼 보여야 합니다.
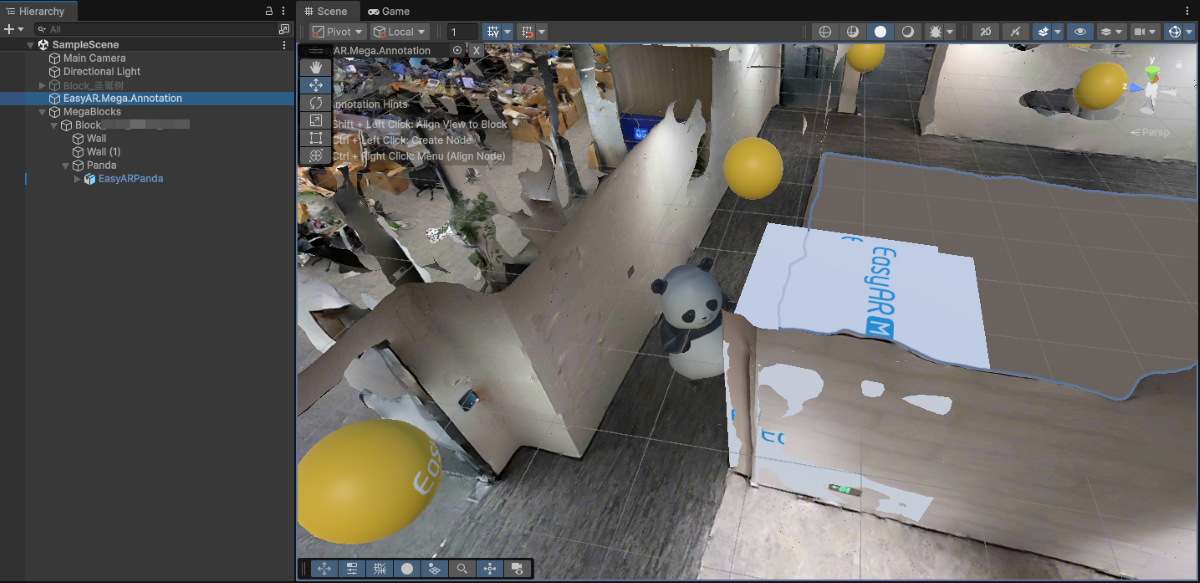
어노테이션 이름 수정(예:
occlusion_wall), ID 기록 후 업로드합니다.xr-frame 미니프로그램에서 내장 기하체를 사용해 오클루전 어노테이션을 로드합니다.
EMA 로드 콜백에서
scene.createElement(xrFrameSystem.XRMesh,{})로 간단한 기하체를 생성하고easyar-occulusion머티리얼을 적용합니다.참고
easyar-occulusion머티리얼의 로드, 등록, 등록 해제, 언로드는 AR Session이 제어합니다.
handleEmaResult(ema: easyar.ema.v0_5.Ema) {
    let blockHolder: easyar.BlockHolder = session.blockHolder;
    ema.blocks.forEach(emaBlock => {
        const blockInfo: easyar.BlockInfo = {
            id: emaBlock.id
        };
        // Block 노드가 존재하지 않으면 Block 노드 생성
        blockHolder.holdBlock(blockInfo, easyarPlugin.toXRFrame(emaBlock.transform));
    });
    ema.annotations.forEach(annotation => {
        if (annotation.type != mega.EmaV05AnnotationType.Node) {
            return;
        }
        const nodeAnnotation = annotation as easyar.ema.v0_5.Node;
        const xrNode: xrfs.XRNode = easyarPlugin.createXRNodeFromNodeAnnotation(nodeAnnotation, blockHolder);
        const emaName: string = nodeAnnotation.name;
        const geometryStr: string = nodeAnnotation.geometry === "cube" ? "cube" : "sphere";
        const assetInfo = AnnotationMetaData[nodeAnnotation.id as keyof typeof AnnotationMetaData];
        let model: xrfs.Element;

        if (assetInfo) {
            // GLTF 부분
        } else {
            model = scene.createElement(
                xrFrameSystem.XRMesh,
                {
                    // 플러그인에 등록된 오클루전 머티리얼 사용
                    material: "easyar-occlusion",
                    // xr-frame 내장 기하체 사용, 여기서는 "cube" 직접 사용 가능
                    geometry: geometryStr,
                    name: emaName,
                    "receive-shadow": "false",
                    "cast-shadow": "false"
                    // Scale 수정하지 않도록 주의
                }
            );
            xrNode.addChild(model);
        }
    })
}
<video src="https://doc-asset.easyar.com/develop/wechat/mega/media/occlusion03.mp4" style="width:480px; max-width:100%; height:auto;" muted playsinline controls></video>

> 오클루전 적용 후, 이 팬더는 벽 뒤에서 춤을 출 수 있습니다.
복잡한 기하체 오클루전 배치 방법
비정형 장비, 불규칙 건축물 등 고정밀 오클루전이 필요한 시나리오에 적합합니다.
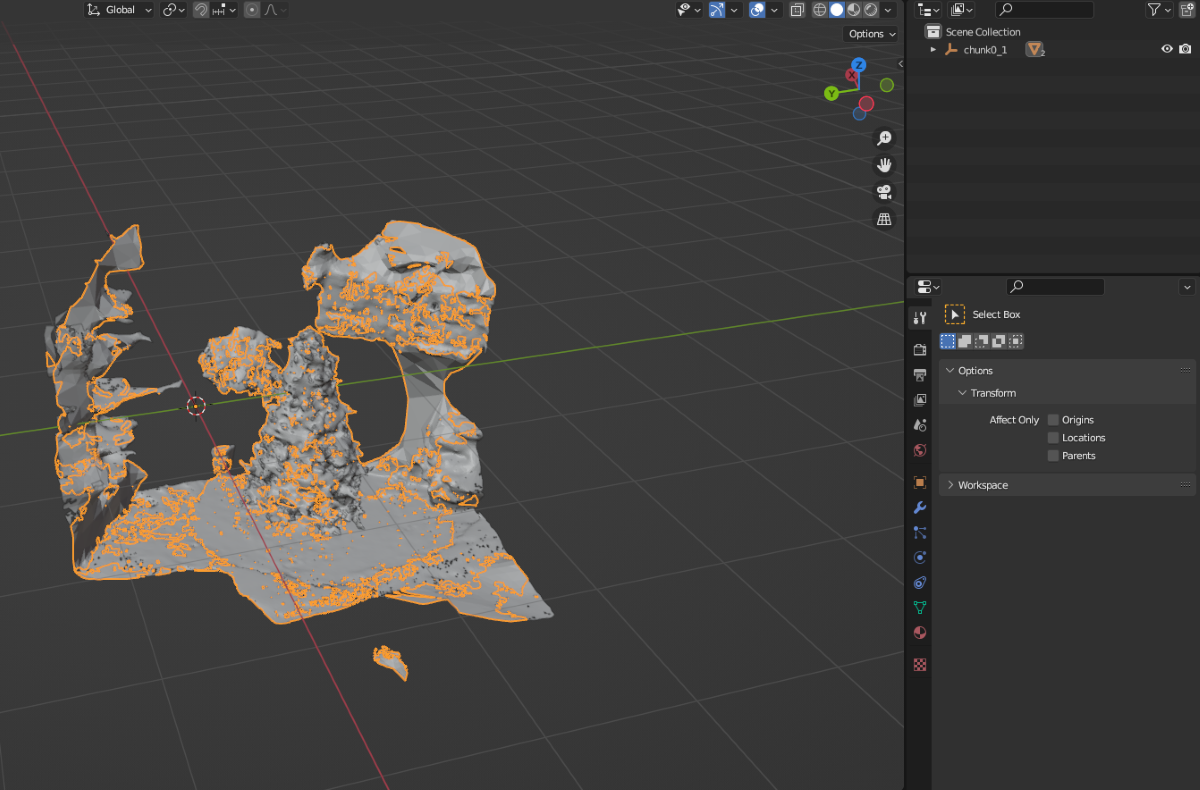
Block의 밀집 모델을 절단하고 면을 감소시켜 오클루전용 흰색 모델(white model)을 생성할 수 있습니다.
Unity 씬에서 Mega Block 노드를 클릭, Inspector 패널에서 BlockID 기록
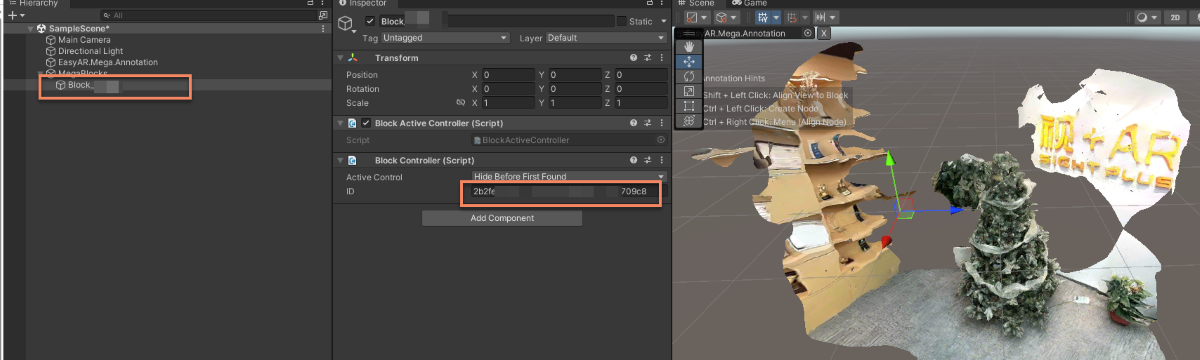
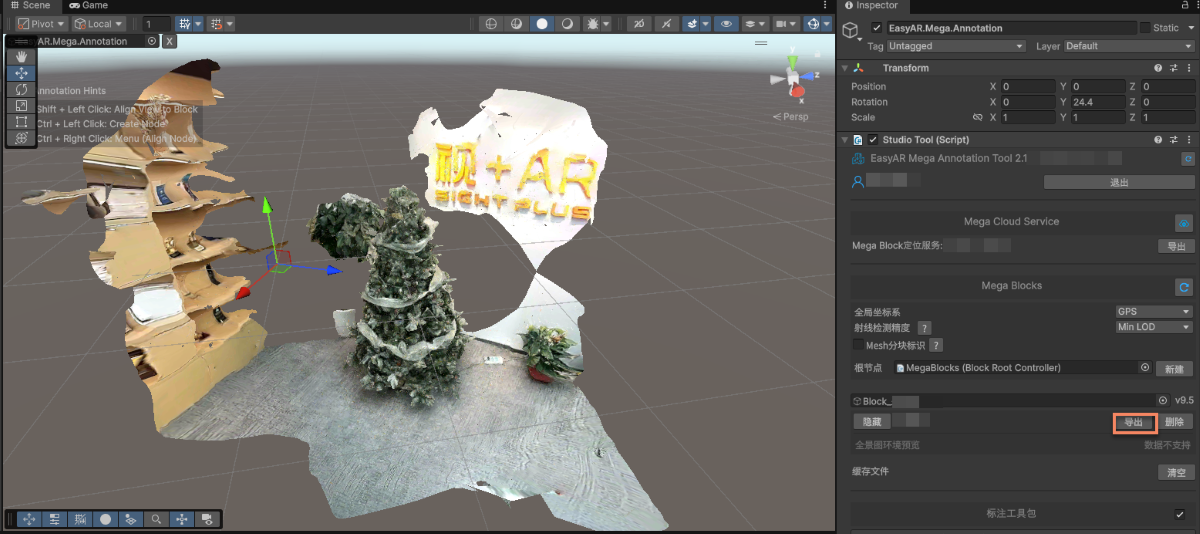
Mega Studio의 Block에서 내보내기 선택.
내보내기 옵션 수정 후 내보냅니다.
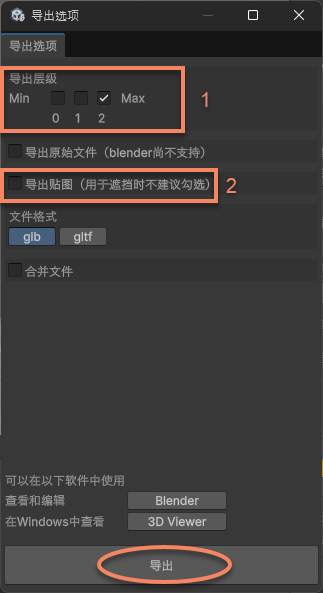
그림 1은 LOD 레벨로, 레벨이 낮을수록 모델이 단순해지고 면 수가 줄어듭니다. 최고 정밀도가 필요하면 2, 정밀도 저하를 허용하며 면 수를 줄이려면 1 또는 0을 선택합니다.
그림 2는 텍스처 내보내기 옵션으로, 오클루전용 흰색 모델에는 텍스처가 필요 없습니다.
내보낸 모델을 Blender 같은 DCC 툴에서 절단 및 면 감소 후
Glb로 저장.팁
예시에서는 Blender의 Decimate Modifier 사용
절단 및 면 감소 후:

오클루전용
Glb파일을 파일 서버에 업로드, 로딩용 URL 획득.xr-frame 미니프로그램에서 오클루전용 GLTF 로드.
먼저 오클루전용 GLTF 모델을 로드한 후,
scene.createElement(xrFrameSystem.XRGLTF,options)로 GLTF 모델 생성.assets.getAsset("material", "easyar-occlusion")으로 머티리얼 객체 획득model.getComponent(xrFrameSystem.GLTF).meshes.forEach((m: any) => {m.setData({ neverCull: true, material: occlusionMaterial });}로 GLTF 모델의 머티리얼 수정.참고
easyar-occulusion머티리얼의 로드, 등록, 등록 해제, 언로드는 AR Session이 제어합니다.
const sampleAssets = {
    occlusion1: {
        assetId: "occlusion1",
        type: "gltf",
        src: "url/occlusion1.glb",
        options: {}
    }
}
async loadAsset() {
    if (!scene) {console.error("Empty scene"); return;}
    try {
        await scene.assets.loadAsset(sampleAssets.occlusion1);
    } catch (err) {
        console.error(`Failed to load assets: ${err.message}`);
    }
},
addOcclusion() {
    model = scene.createElement(
        xrFrameSystem.XRGLTF,
        {
            "model": assetInfo.assetId,
            "anim-autoplay": assetInfo.animation ? assetInfo.animation : "",
            "scale": assetInfo.scale ? assetInfo.scale : "1 1 1",
            name: "tree"
        }
    );
    const blockID = "aaaa1234-bbbb-cccc-dddd-eeeeee123456" //여기에 Block ID를 입력해야 합니다
    if (!blockHolder.getBlockById(blockParent.id)) {
        // 존재하지 않는 Block 노드가 있는 경우 새로 생성
        blockHolder.holdBlock({
            id: blockID
        })
    }
    // xr-frame 씬에서 Block 노드 가져오기
    let blockElement = blockHolder.getBlockById(blockParent.id).el;
    // 오클루전 모델을 Block 노드의 자식으로 추가
    blockElement.addChild(model);
    /**
     * GLTF 로더의 동작 차이로 인해, Unity의 렌더링 결과와 xr-frame 상의 모델 방향을 완전히 일치시키려면
     * 로드된 모델을 Y축 기준으로 180도 회전해야 할 때가 있습니다
     */
    let modelTransform = model.getComponent(xrFrameSystem.Transform);
    let currentRotation = modelTransform.quaternion.clone();
    let targetRotation = currentRotation.multiply(new xrFrameSystem.Quaternion().setValue(0, 1, 0, 0));
    modelTransform.quaternion.set(targetRotation);
    //반드시 Transform 수정 후에 머티리얼을 수정해야 합니다
    if (assetInfo.assetId == 'occlusion1') {
        //메가 플러그인이 제공하는 오클루전 머티리얼 가져오기
        let occlusionMaterial = scene.assets.getAsset("material", "easyar-occlusion");
        //오클루전 머티리얼 수정
        model.getComponent(xrFrameSystem.GLTF).meshes.forEach((m: any) => {
            m.setData({ neverCull: true, material: occlusionMaterial });
        });
    }
}
> [!NOTE]
> Mega Block 밀집 모델을 절단해 오클루전으로 사용할 경우 어노테이션으로 공간 위치 동기화가 필요하지 않습니다. 이는 Blender 같은 DCC 툴에서 좌표계 정의를 변경하지 않고 모델을 감소/절단할 수 있기 때문입니다.
>
> 직접 제작한 GLTF 모델 오클루전을 정확히 배치해야 할 경우 [공간 정렬된 오클루전 모델 배치 방법](./sample.md#wechat-mega-sample-precise-occulusion-model) 참조

최종 실기 실행 결과는 상단 동영상을 참조하세요.
오클루전 효과 기대치
xr-frame 미니프로그램에서의 오클루전 효과는 주로 다음에 영향을 받습니다:
- 위치 추적 자체의 정확도
- 모델 배치의 정밀도
- 모델 자체의 정밀도(간단한 기하체가 아닌 경우)
위치 추적이 드리프트될 때 수 cm 정도의 오차는 정상입니다.
오클루전 모델의 면 수가 너무 많으면 성능에 영향을 줄 수 있으므로, 필요한 영역에만 사용하고 가능한 한 간단한 기하체를 오클루전으로 사용하는 것이 좋습니다.