Create large-scale fusion tasks
This article details the complete workflow for large-scale multi-map fusion tasks, including task creation, data preparation, data upload, mapping operations, and result viewing, ensuring users can efficiently complete mapping requirements for complex scenarios.
Large-scale multi-map fusion functionality requires business consultation for activation. We will review based on project requirements and environmental space, unlocking fusion mapping permissions upon approval. After obtaining permissions, you can manually create multi-map fusion tasks in mapping tasks.
Create multi-map fusion task
After completing create project, follow these steps to create a multi-map fusion task:
- Click
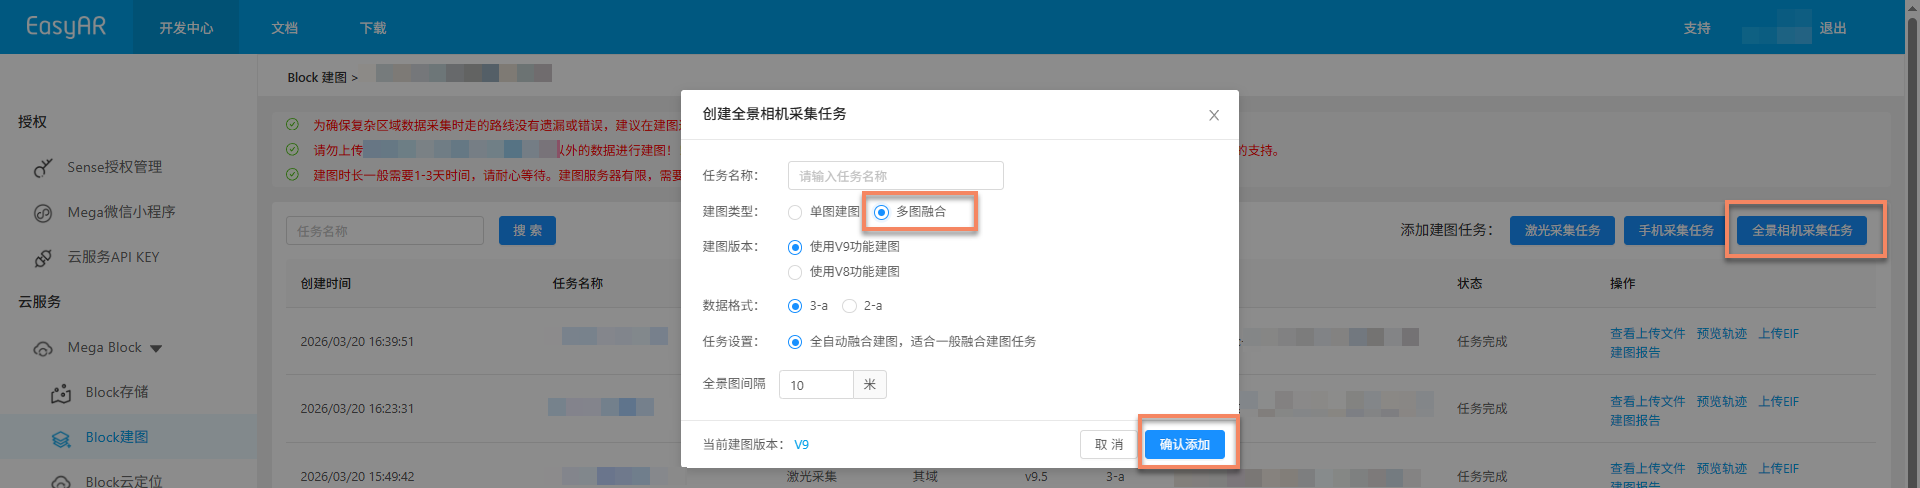
Manageto enter the mapping task management interface. - Click the
Panoramic camera acquisition taskbutton in the upper right corner. - Fill in task information in the pop-up dialog:
- Task name: Enter a custom task name
- Mapping type: Select
Multi-map fusion(requires multi-map fusion mapping permissions) - Mapping version and data format: Recommended to use the latest version
- Click
Confirm addto complete creation.
Note
Large-scale multi-map fusion functionality requires contacting business to activate permissions. After approval, you can create multi-map fusion tasks in mapping tasks.
Add sub-maps
After creating the multi-map fusion task, you need to add sub-map tasks for each independent acquisition area.
Click
Multi-map fusion managementto enter the corresponding multi-map fusion management interface.

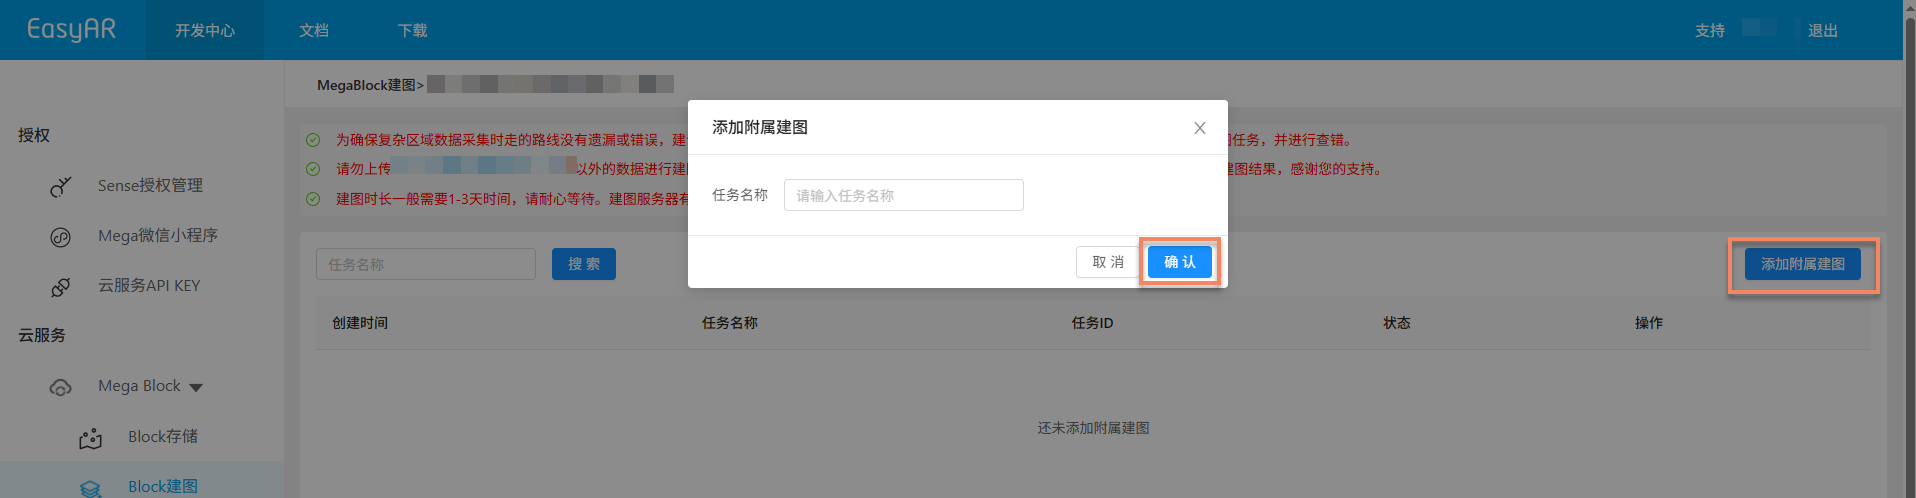
Click
Add sub-map, enter the task name and clickConfirmto create a sub-map. Note that each independent acquisition area requires creating a sub-map task.
Data preparation
Before starting the mapping task, ensure the collected spatial data meets requirements and is organized and stored according to specifications. Data preparation standards are basically consistent with single-map mapping tasks, differing only in acquisition methods.
Data acquisition and export
Use panoramic cameras to collect spatial data. Refer to the following for device configuration and acquisition essentials:
- GoPro Max device configuration
- GoPro Max2 device configuration
- Acquisition route planning
- Large-space data acquisition methods
- Acquisition checklist
- GoPro Max/Max2 data export
Other data specifications
- Data folder naming
- Data storage location
- Data file structure specifications
- Data file naming conventions
Upload data
Upload rules are the same as for single-map tasks. Upload data under corresponding tasks. Refer to single-map task data upload for data upload.
Start multi-map mapping
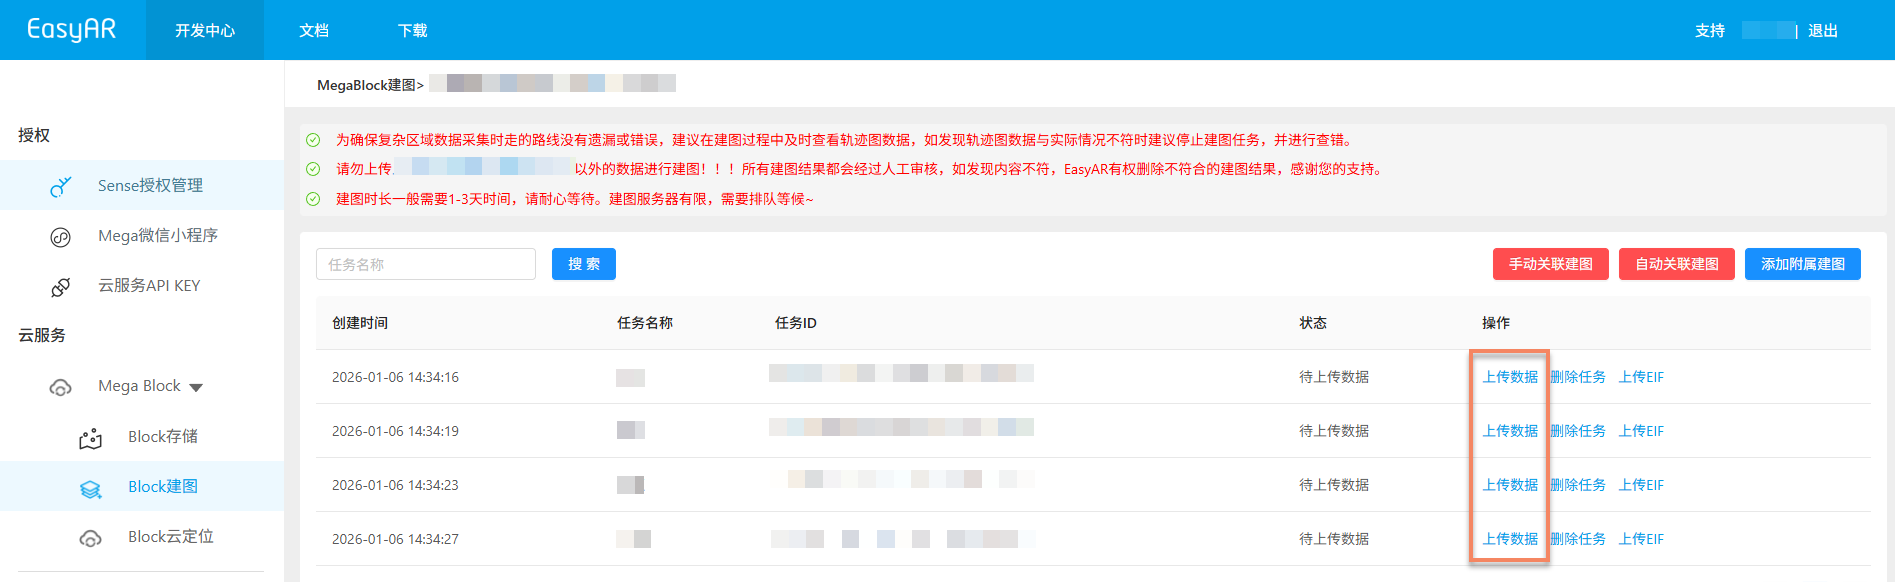
After all task data is uploaded, click Automatic association mapping or Manual association mapping to start mapping. Please wait patiently as multi-map fusion tasks take longer. If not completed for an extended period, contact business.
Automatic association mapping
- Suitable for most scenarios.
Manual association mapping
Applicable when mapping results don't meet expectations.
Steps to manually specify multi-map acquisition relationships:
Arrange sub-task blocks according to actual relative positional relationships of acquisition areas

Create connection relationships between sub-tasks
Principle: Add connections when sub-task acquisition data has overlapping areas.
Steps:- Click one sub-task, then click another sub-task to connect.
- Handling misoperations: Click the connection line to turn it red, then click
Delete connectionto remove. - Delete all connections: Click
Clear relationshipsin the upper right. - Temporary save: Click
Savein the upper right to continue later if needing to review uploaded data.
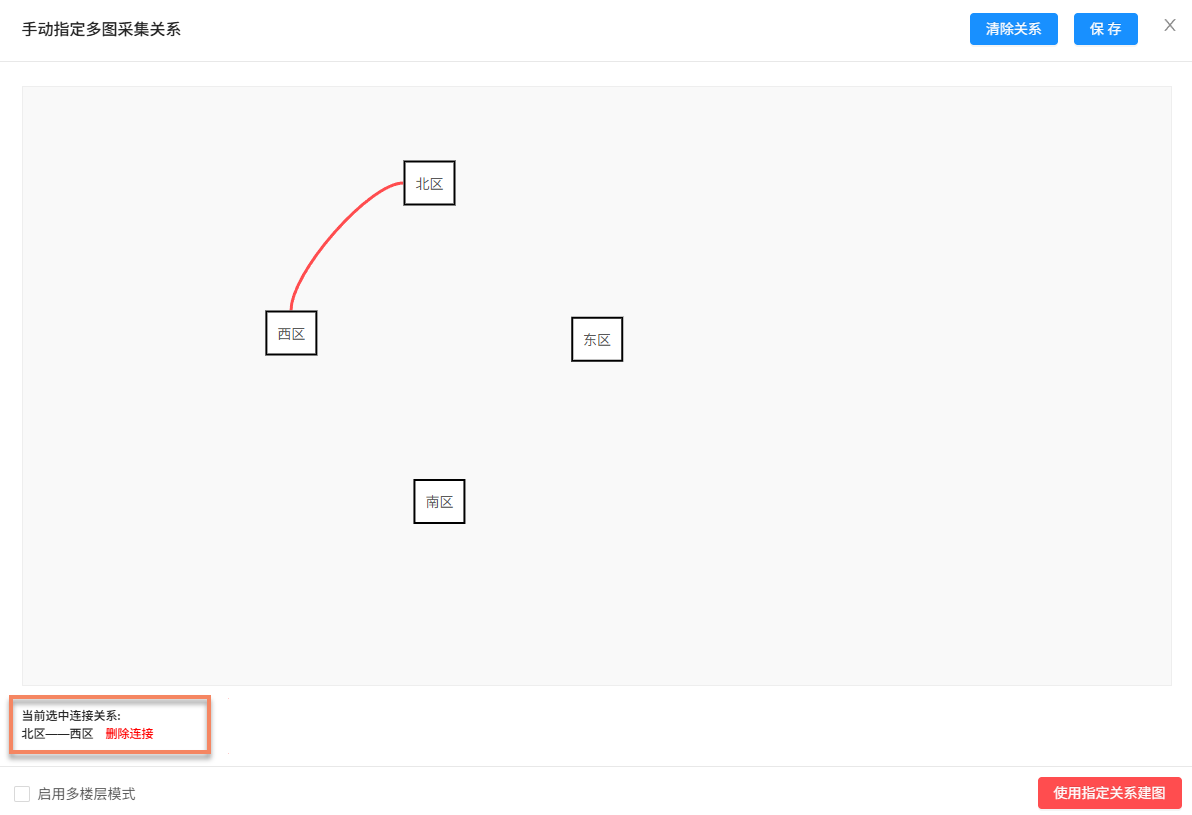
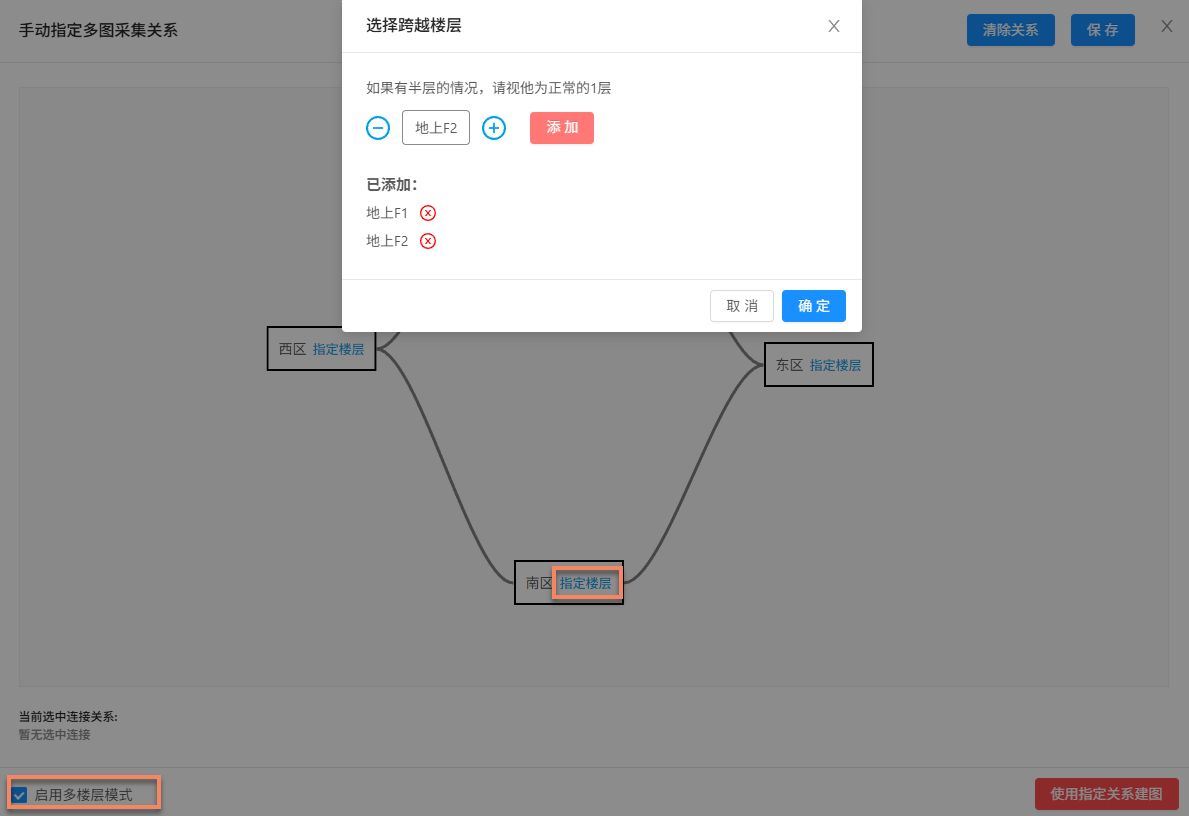
For cross-floor acquisition scenarios, enable multi-floor mode to assign floor information to sub-maps:
a. CheckEnable multi-floor mode.
b. ClickAssign floorin each sub-map box to add floor information.
After verifying all sub-task connections are correct, click
Start mapping with specified relationshipsin the lower right to begin mapping.
Auxiliary functions
The following functions help better manage and operate mapping tasks, improving efficiency:
View uploaded files
Used to check if uploaded mapping files are complete, avoiding mapping failures due to missing files.
Click
Multi-map fusion managementin the operation bar, then clickView uploaded files. Check the file list for corresponding sub-maps in the pop-up to confirm complete upload.
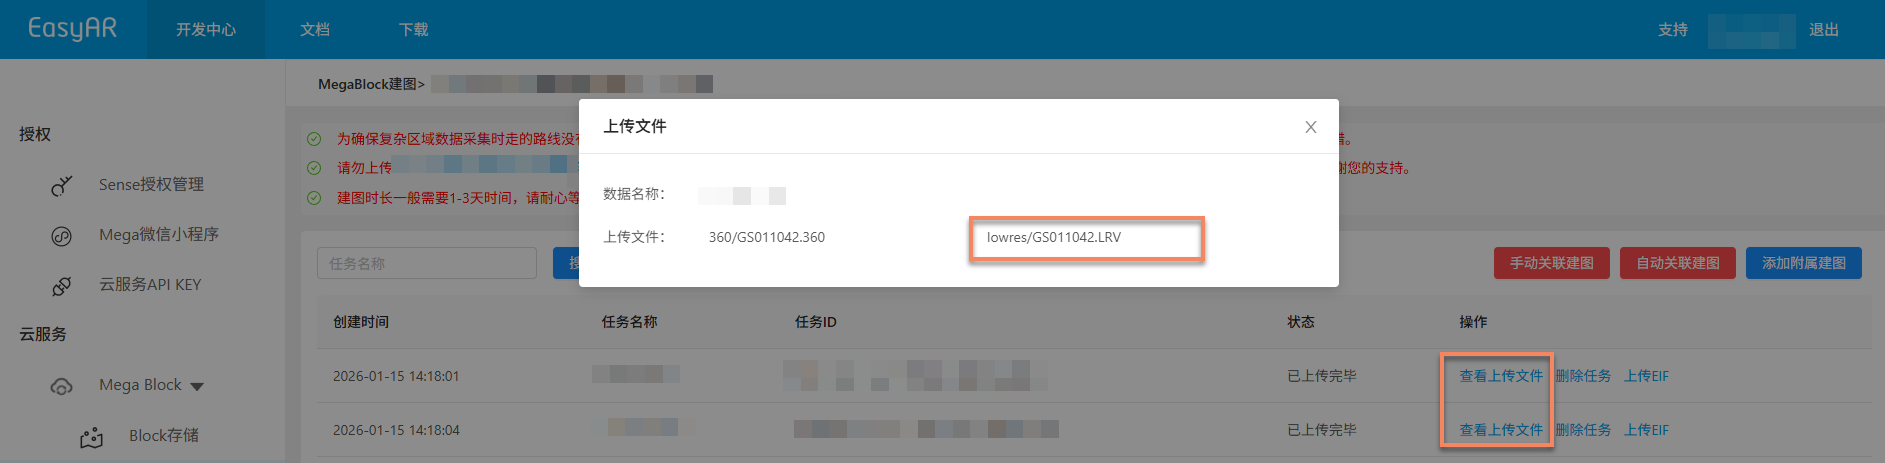
Click specific
LRV filesto preview video content online, ensuring data quality meets requirements.

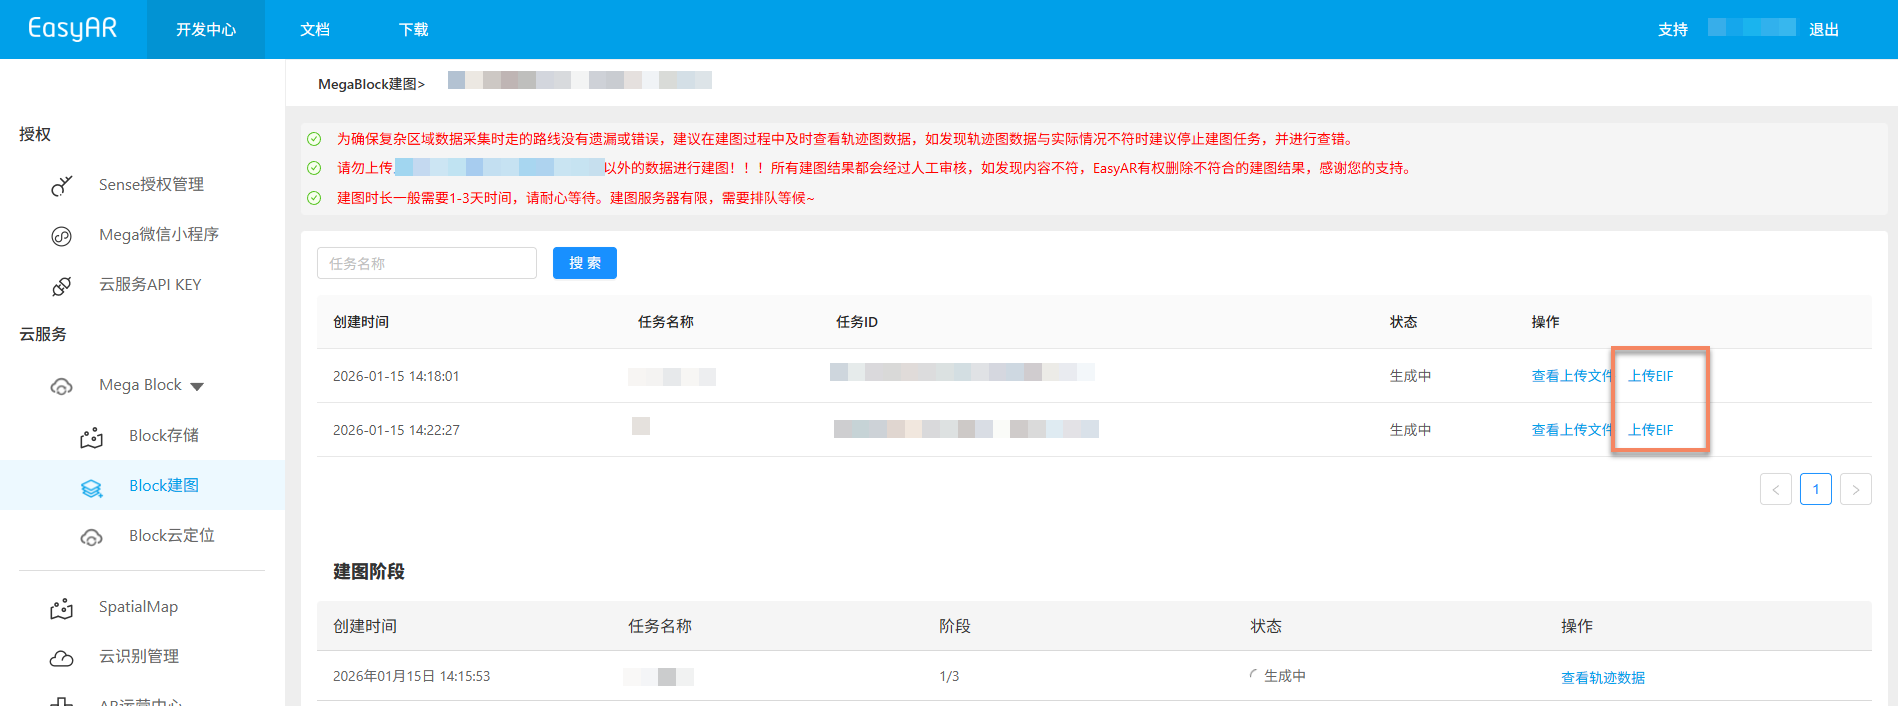
Upload EIF
EIF data is specialized test data for remote debugging and simulated localization in Mega, used for remote Mega verification and supporting simulated localization during remote development. It must be acquired through specified tools. For detailed collection methods, refer to EIF data acquisition guide.
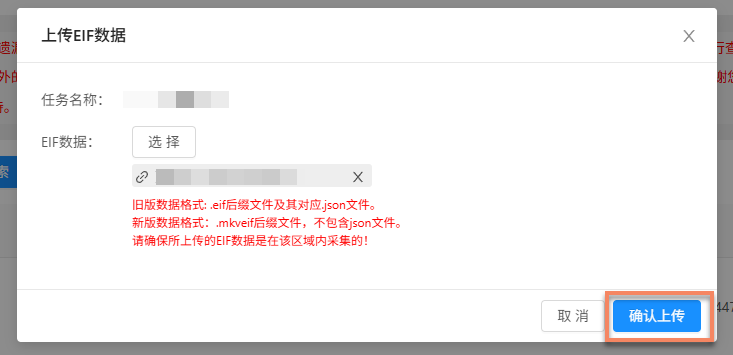
Upload EIF steps:
- Click
Multi-map fusion managementin the operation bar. In the corresponding sub-map operation bar, clickUpload EIF.
- Select the EIF data directory folder and click
Confirm upload.
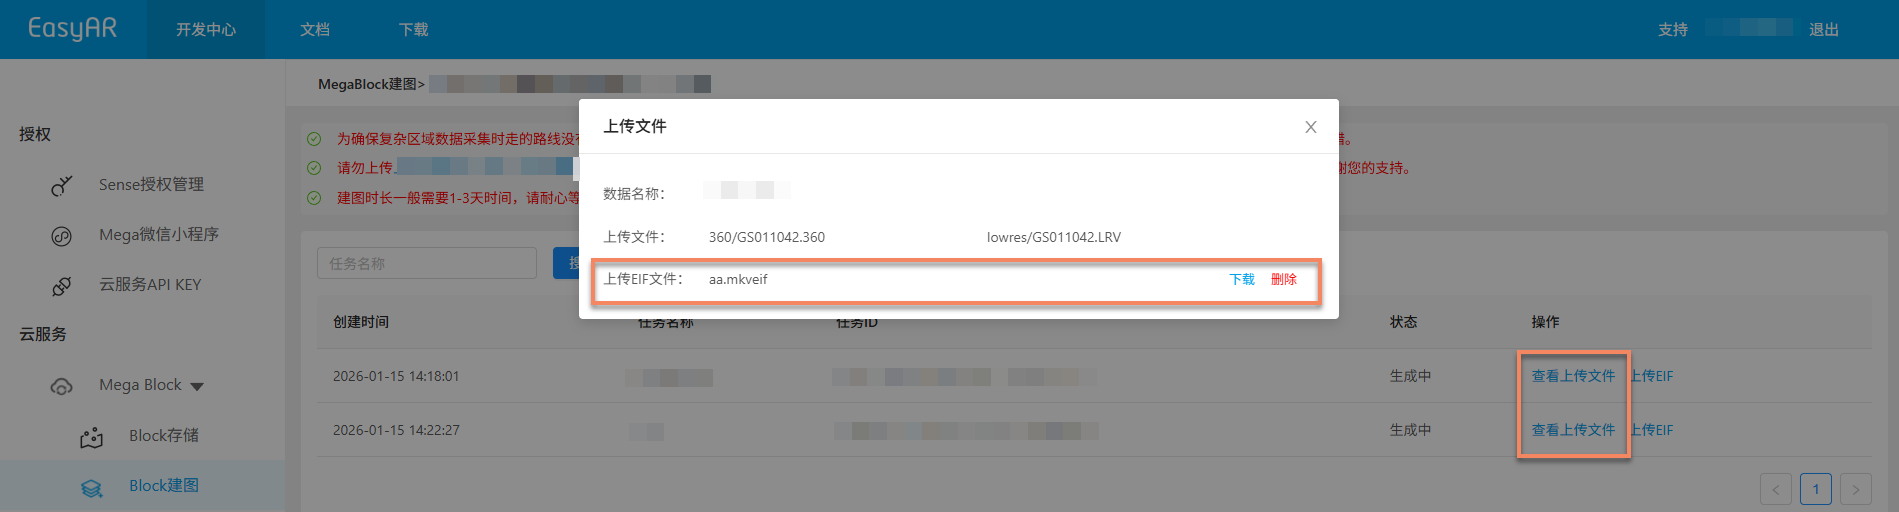
View uploaded data:
After upload, click View uploaded files to see uploaded EIF files in the pop-up, supporting Download and Delete operations.
Stop mapping
Before multi-map fusion task completion, if incorrect data is uploaded or trajectory data doesn't match reality, click Stop mapping. Confirm in the secondary pop-up to stop mapping.

Delete task
If current mapping task fails or is no longer needed, click Delete task. Click Delete in the confirmation pop-up to complete deletion.

Confirm mapping results
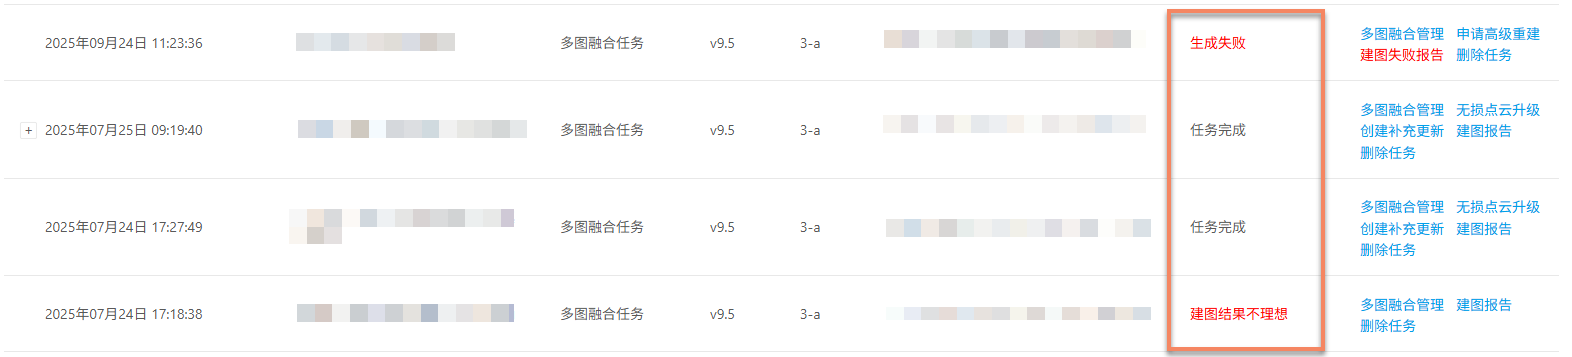
After the task enters the mapping process, use Task status to determine completion. When the multi-map fusion task status shows Task completed, Mapping result not ideal, or Generation failed, the mapping task has ended.
Mapping success
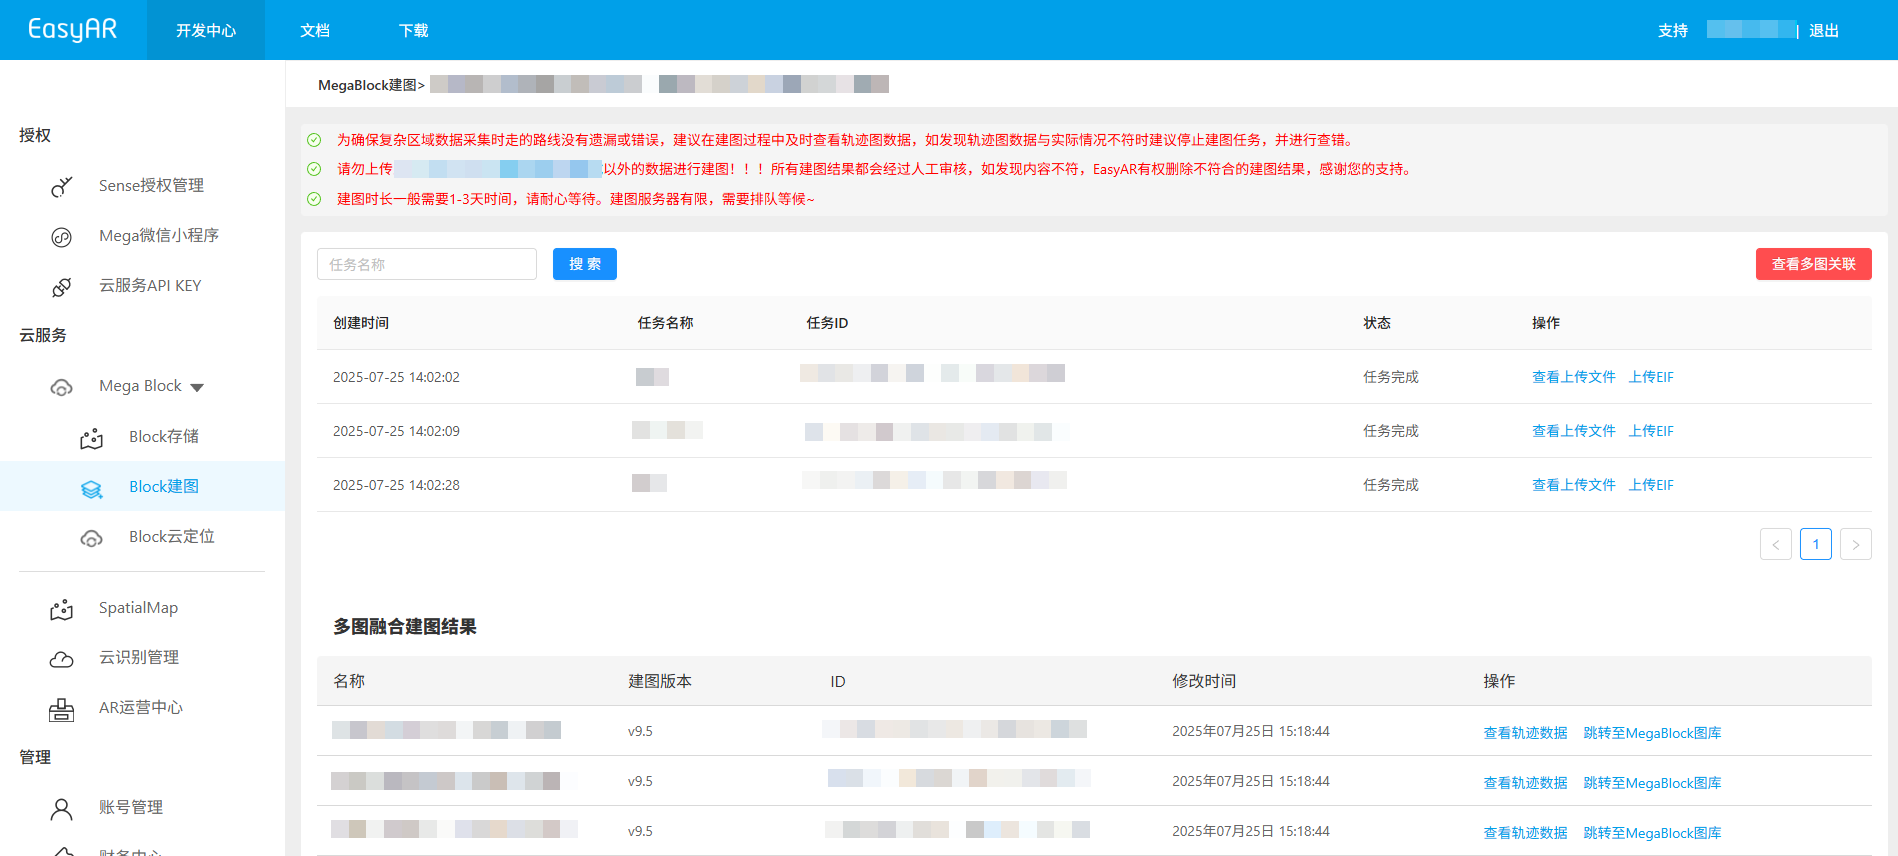
When task status shows Task completed or Mapping result not ideal, mapping succeeded and results are generated. After multi-map mapping completes, results display in the multi-map fusion management interface.
Mapping result explanation:
Task completed: Mapping completed and fusion successful, resulting in a complete Mega Block.
Mapping result not ideal: Mapping completed but fusion poor, resulting in multiple Mega Blocks.
When
Mapping result not idealappears, we recommend checking:- Acquisition route compliance: Ensure routes follow specifications with sufficient overlap between sub-maps. (Reference: Acquisition specifications)
- File upload completeness: Ensure all files are uploaded without omissions. (Reference: Preview uploaded files)
- Acquisition area coverage: Ensure full coverage of required areas without missed acquisitions. (Reference: Review acquisition routes)
- Manual association accuracy: If manual association mapping was performed, ensure sub-map relationships are correctly specified. (Reference: Manual association mapping)
If any issues are found, correct them and recreate the task. If all checks confirm no issues, contact us for assistance.
View mapping results:
Mapping failure
When task status shows Generation failed, mapping has failed. We recommend troubleshooting as follows:
- View mapping report: View mapping report and find solutions based on report information.
- Reference troubleshooting: Consult Mapping failure troubleshooting guide for common solutions.
- Contact technical support: If above methods don't resolve the issue, contact EasyAR staff and provide the
JobIDfrom the mapping report for quick problem identification.